Why Backsplash Tile Around Outlets Demands Your Attention
Backsplash tile around outletsis one of the trickiest parts of any kitchen renovation. Industry data shows that while 70% of homeowners tackle DIY kitchen updates, working around electrical boxes often stops them. The challenge isn’t just aesthetic—it’s about safety, building codes, and achieving a seamless finish.
Quick Answer: Installing Backsplash Tile Around Outlets
- Turn off powerat the circuit breaker and test with an electrical tester
- Remove outlet coverand loosen the outlet from the electrical box
- Install outlet extendersto bring the box flush with your new tile depth
- Measure and markyour tile cuts (add 1/4 inch for cover plate overlap)
- Cut tilesusing appropriate tools (wet saw, angle grinder, or tile nipper)
- Apply adhesiveand install cut tiles around the outlet opening
- Groutbetween tiles after adhesive dries
- Reattach outletand replace cover plate
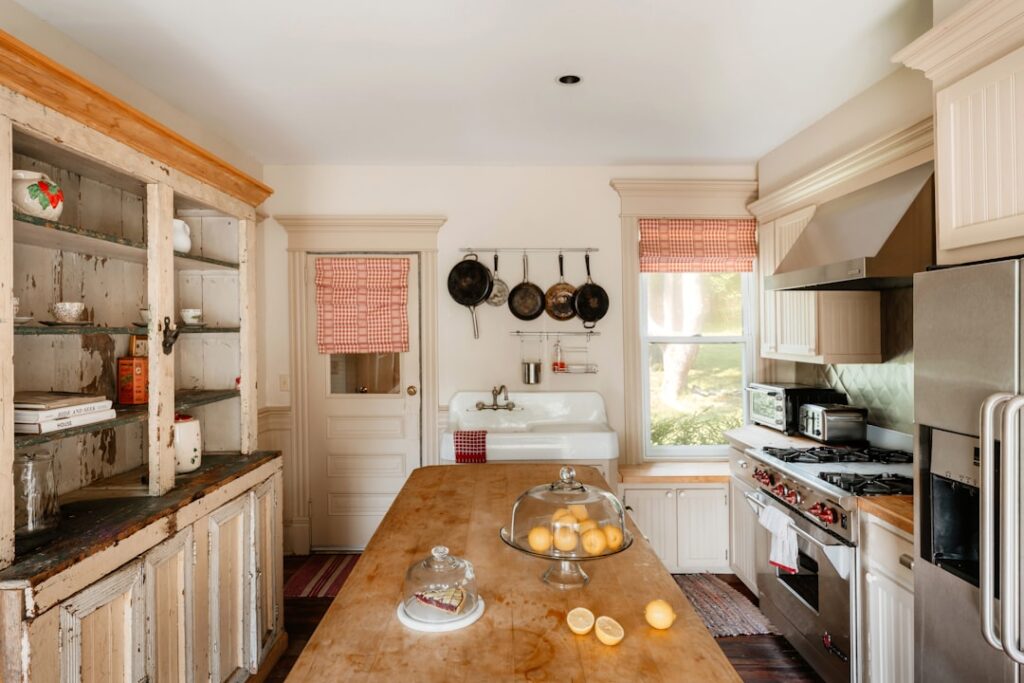
Many home tiling jobs require working around existing electrical outlets. Kitchens and bathrooms often have multiple outlets to incorporate. The good news is that with the right preparation and tools, this is a manageable DIY project that can save you $300 to $1,000 in labor costs.
The biggest mistake?Leaving outlet and switch placement as an afterthought. As one design expert notes, “You can have the most beautiful, expensive tile with a fabulous pattern for your kitchen backsplash and ruin it with a few missteps.”
This guide covers every step, from safely turning off the power to achieving a clean, professional finish where outlet covers sit flush with your new backsplash.
, Step 2 - Measure and Mark (measure outlet dimensions, add 1/4 inch for overlap, mark tiles), Step 3 - Cut Tile (use wet saw or angle grinder for clean cuts, tile nipper for small adjustments), Step 4 - Install Tile (apply adhesive, fit tiles around outlet, use spacers), Step 5 - Finish (grout tiles, reattach outlet with extenders, replace cover plate) - backsplash tile around outlets infographic")
Backsplash tile around outletsterms at a glance:
Step 1: Safety First and Wall Preparation
Before touching a tile, our top priority when working withbacksplash tile around outletsis safety. Electricity is no joke, and a moment of carelessness can lead to serious injury. Let’s ensure we’re fully prepared and protected.
Essential Safety for Working with Backsplash Tile Around Outlets
The first and most important step is to cut the power. Head to your home’s main electrical panel (usually in a garage, basement, or utility closet) and find the circuit breaker for the outlets in your work area. Flip that breaker to the “off” position. Don’t assume it’s off just because the kitchen lights went out.
Next, you must verify that the power is off. Use an electrical tester (a non-contact voltage tester is quick and easy) to check the outlet. Touch the tester to each slot; if it remains silent and shows no light, you’re good to go. If it beeps or lights up, the power is still on, and you need to go back to the breaker panel to find the correct switch. “You should only begin working after you’re sure the area is safe.”Before doing any work on the outlet, it’s essential to turn off the power around the area you’re working on. Then, use the electrical tester to ensure there’s no voltage going to the wall outlet to prevent an electrical shock. You should only begin working after you’re sure the area is safe.
Once the power is confirmed off, safely remove the outlet cover plate with a screwdriver. Then, loosen the screws holding the outlet to the electrical box. You don’t need to disconnect any wires, just loosen it enough so the outlet can be pulled forward slightly.
Beyond electrical safety, protect yourself from the tiling process. Cut edges of ceramic or stone tiles can be very sharp, so always wear eye protection and work gloves. These are essential for preventing cuts and eye injuries.
Now, let’s talk about building codes, especially relevant for Orlando, FL homeowners. Electrical codes exist for safety and proper functionality. Here are key considerations for kitchen outlets:
- GFCI Protection:Outlets near sinks (common in kitchens) must be Ground-Fault Circuit Interrupter (GFCI) outlets. These have “test” and “reset” buttons and are designed to prevent electrical shock in wet conditions.
- Outlet Spacing:Electrical codes state that outlets cannot be placed face-up on a kitchen counter. They must also be located less than 48 inches apart on walls with base cabinets 12 inches or higher. This ensures convenient access to power without needing excessive extension cords.
- Height Restrictions:Outlets generally cannot be placed more than 20 inches above a worktop. However, exceptions exist for those with physical challenges or on peninsulas or islands. If you’re unsure about requirements for your home in Orlando, Orange County, or Seminole County, it’s best to consult a local electrician.On the other hand, electrical codes state that outlets cannot be placed with their face up on a kitchen counter. They must also be located less than 48” apart on walls with base cabinets running 12 inches or higher. Building rules also state outlets near sinks need GFCI outlets (ground-fault circuit in…)
How to Extend an Electrical Box for Tile
Adding a new backsplash adds thickness to the wall, meaning your existing electrical outlets will now be recessed. This is not just an aesthetic issue; it’s a safety and code compliance problem. The electrical code requires the outer edge of the electrical box and the backsplash tile to be flush.

This is where outlet extenders come in. These clever devices bring the electrical box forward, making it flush with the new tile surface. They are inexpensive, typically costing $1 to $3 per extender. You have a few options:
- Accordion-style Spacers:These are plastic rings with stackable segments. Each segment adds about 1/8 inch. Simply snap off the number of segments needed to match your tile thickness.
- Box Extenders:These are more rigid, box-like structures that fit over the existing electrical box. They come in various depths to extend the box to the new surface.
To install an extender, slip it over the existing electrical box before installing your tiles. Once the tiles are in place, the extender brings the box opening flush with the tile surface. A common issue is that the original screws holding the outlet to the box may now be too short. This is normal. You’ll just need to purchase longer 6-32 machine screws from a hardware store to securely reattach the outlet, as discussed in our FAQ section.
By properly extending the electrical box, you ensure that your outlet cover plates will sit flat against the newbacksplash tile around outlets, providing a clean, professional look and maintaining electrical safety.
Step 2: The Step-by-Step Guide to Installing Backsplash Tile Around Outlets
Now that we’ve covered safety and prepared our outlets, it’s time for the fun part: measuring, cutting, and installing our tiles! This is where precision and patience pay off, especially when dealing with the intricate cuts required forbacksplash tile around outlets.
How to Measure and Mark Tiles for Outlet Cuts
The golden rule of any tiling project, especially around obstacles, is “measure twice, cut once.” This saves us from wasting precious tiles and time.
- Dry-Fit Your Tiles:Before applying any adhesive, lay out your tiles on the countertop below the backsplash area to get a sense of the pattern and where cuts will fall. This helps us visualize how tiles will interact with the outlets.
- Position Tiles Up to the Outlet:When we reach an outlet, we’ll place the tile (or tile sheet) as if it were being installed, letting it overlap the outlet opening.
- Transfer Measurements:With the tile in place, we’ll use a pencil or marker to carefully mark the exact dimensions of the outlet box onto the tile. We need to mark the inner edges of the box opening.
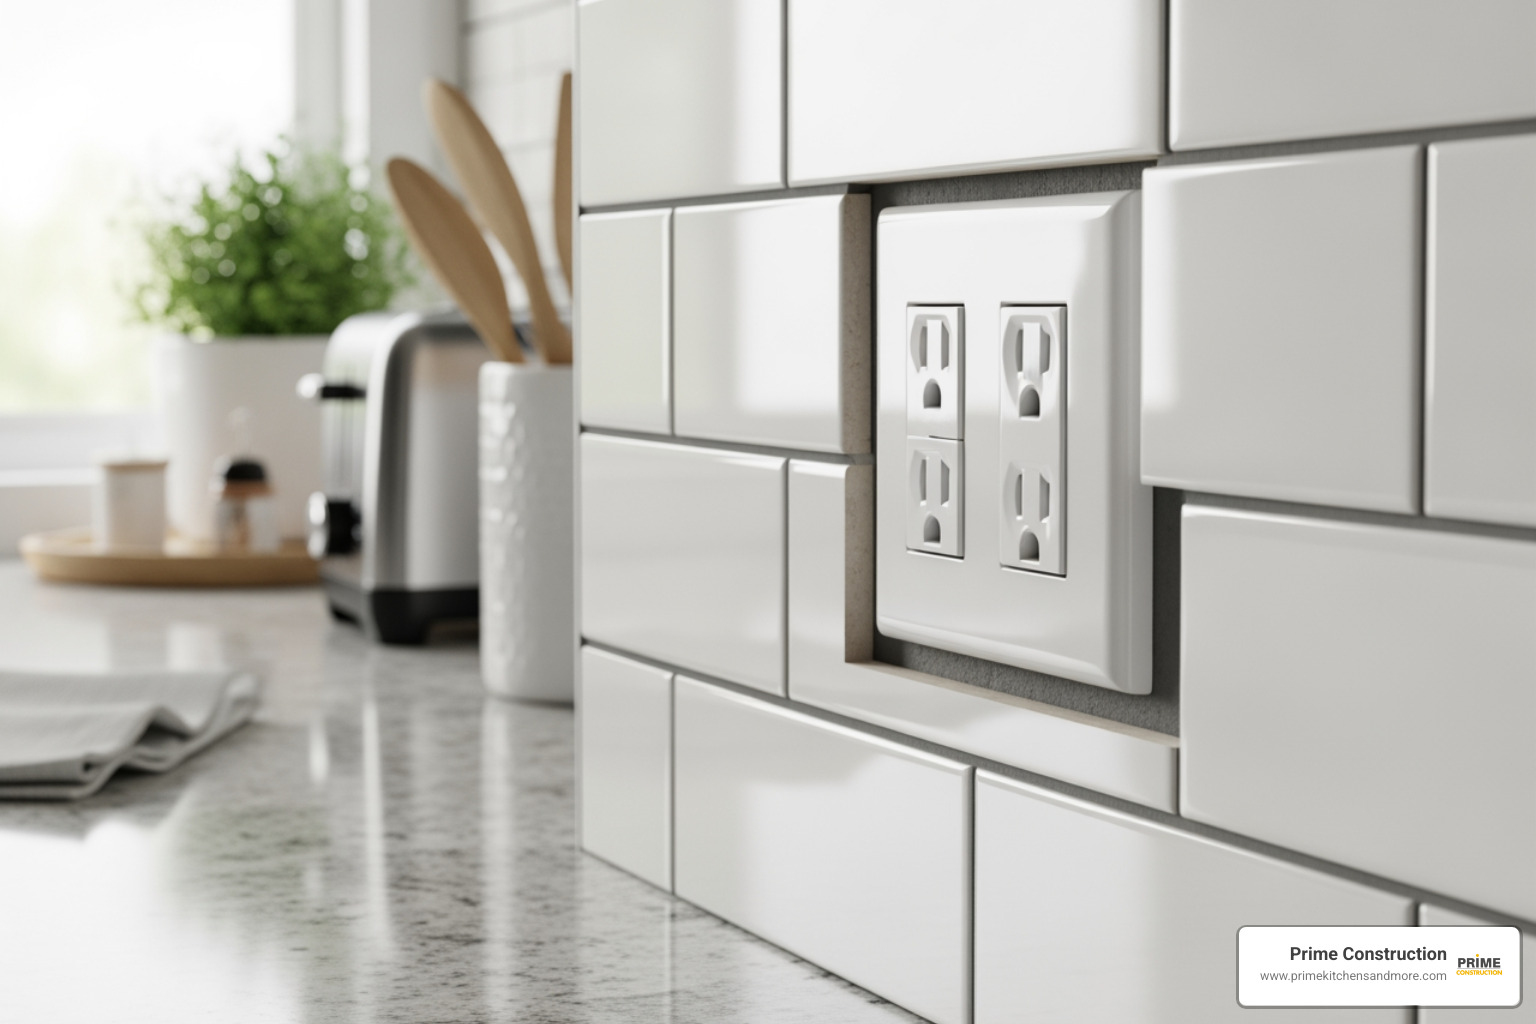
- Account for Faceplate Overlap:Here’s a crucial tip: the outlet faceplate is designed to cover a small area around the actual outlet. To ensure a clean finish and allow the faceplate to hide any minor imperfections in our cuts, we need to add approximately 1/4 inch to our marked measurements on each side. So, if the outlet box is 2 inches by 4 inches, our tile cut-out should be roughly 2.5 inches by 4.5 inches. This allows the faceplate to beautifully overlap the tile edges.
- Refine Marks:We can also temporarily place the outlet cover plate over the marked tile and trace its inner perimeter to get an even more accurate guide for our cut.
For complex arrangements, especially with mosaic tiles, we might even create a template out of paper or cardboard first, then transfer that template to our tile. This careful measuring and marking ensures our cuts are precise and our final installation looks seamless.
Best Tools and Methods for Cutting Tile
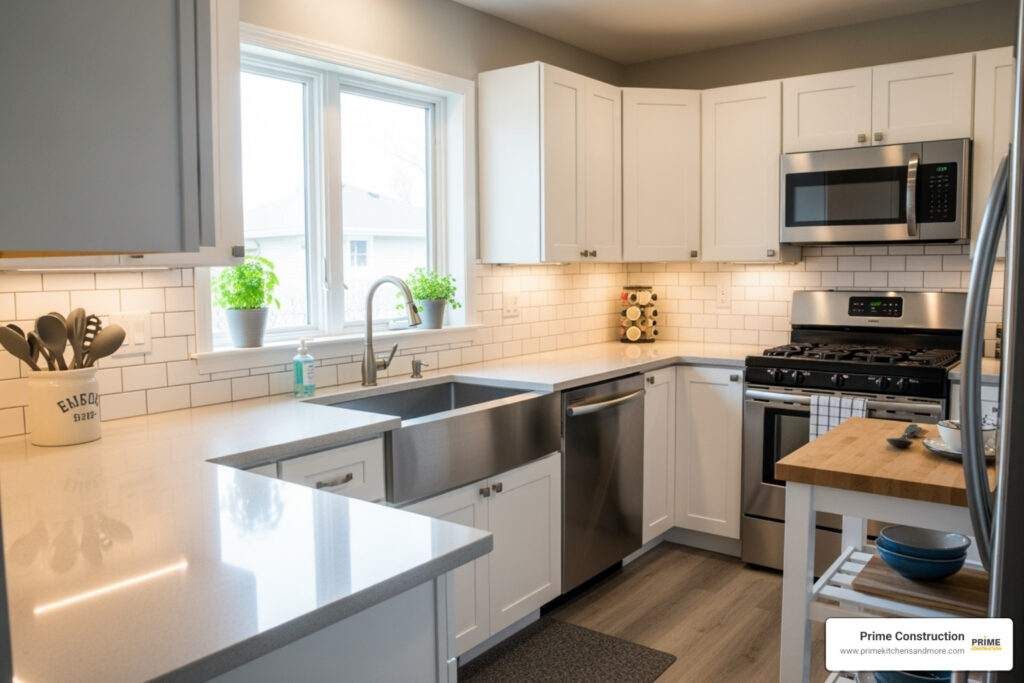
The type of tile we’re using for ourbacksplash tile around outletswill dictate the best cutting tools and methods. Ceramic tile is the most popular backsplash material, accounting for approximately 60% of installations, but glass, natural stone, and even peel-and-stick options require different approaches.
Here’s a comparison of common cutting tools:
| Tool | Best For | Pros | Cons |
|---|---|---|---|
| Wet Tile Saw | Ceramic, Porcelain, Stone, Glass (with right blade) | Precise, clean cuts; Handles thick tiles; Reduces dust. | Messy (water spray); Requires setup; Can be intimidating for beginners. |
| Angle Grinder | Larger, thicker tiles (stone, porcelain) | Powerful; Good for L-shaped cuts; Portable. | Very dusty; Requires diamond blade; Can be difficult to control for intricate cuts. |
| Tile Nipper | Mosaic tiles, small ceramic pieces, irregular cuts | Good for fine adjustments, nipping small sections. | Not for long, straight cuts; Can chip delicate tiles. |
| Utility Knife | Peel-and-stick tiles, flexible vinyl sheets | Easy to use; Inexpensive; Clean cuts on appropriate materials. | Only for thin, soft materials; Not for traditional tiles. |
| Oscillating Saw | Rigid peel-and-stick (SPC/LVT) | Good for precise cuts on thicker peel-and-stick. | Can be slow; Requires specific blade. |

Let’s look at specific tile types:
- Ceramic and Porcelain Tiles:For these, a wet tile saw is our best friend, especially for L-shaped cuts around outlets. A good wet saw with a diamond blade will make clean, precise cuts. For smaller, more intricate adjustments, tile nippers can be used to “nibble” away material.
- Glass Tiles:Glass tiles require extra care. We’ll need a wet saw with a specialized glass-cutting blade to prevent chipping and cracking. Take your time, and make sure the blade is wet throughout the cut.
- Mosaic Sheets:These are often mesh-backed. For cuts around outlets, we can often cut the mesh backing with a utility knife to separate individual tiles or sections. For a perfect fit, we might need to use tile nippers to carefully snip individual mosaic pieces (tesserae) into the exact shape needed. The goal is to get the tile close enough to the outlet box so that the faceplate covers any cut edges.
- Peel-and-Stick Tiles:This popular DIY option is generally easier to cut. For flexible vinyl or gel peel-and-stick tiles, a sharp utility knife or heavy-duty scissors will do the trick. For more rigid peel-and-stick options (like SPC or LVT), an oscillating saw or a very sharp box cutter can be effective. When using power tools, it’s a good practice to mark your cuts on the back of the tile to protect the finished surface.
No matter the tool, always wear your eye protection and work gloves. Cutting tiles can create sharp edges and flying debris.
Step 3: Achieving a Flawless Finish and Design
With our tiles cut and ready, we’re on the home stretch to a stunning kitchen backsplash. This final stage is all about meticulous installation, grouting, and ensuring those outlets blend seamlessly into our beautiful new design.
How to Ensure a Clean and Professional Finish
The key to a professional-looking backsplash lies in careful application and attention to detail:
- Applying Thin-Set Mortar:We’ll apply our tile adhesive (thin-set mortar or mastic, depending on our tile type) to the wall using a notched trowel. For the areas around outlets, apply the adhesive carefully, ensuring we don’t glob it into the electrical box opening. We can also “back-butter” the individual tiles we’ve cut to fit around the outlet for better adhesion.
- Installing Cut Tiles:Gently press our pre-cut tiles into the adhesive around the outlet opening. We’ll use tile spacers to maintain consistent grout lines between these tiles and the surrounding ones. It’s crucial that the outlet flanges (the metal tabs on the outlet itself) sit perfectly over the tiles without applying pressure or getting in the way of the screws.
- Allowing Adhesive to Dry:This is not a step to rush. Most adhesives require between 12 and 24 hours to fully dry and set. “Waiting allows the backsplash to set and grout, ensuring the kitchen tile backsplash looks perfect around the outlet…” After ensuring that the backsplash tiles sit perfectly in place, let the adhesive dry. You might need to wait between 12 and 24 hours, but it can vary depending on the adhesive you use. Waiting allows the backsplash to set and grout, ensuring the kitchen tile backsplash looks perfect around the outlet…. Always check the manufacturer’s recommendations for our specific product.
- Grouting Process:Once the adhesive is fully cured, we can apply our grout. Using a rubber float, we’ll press the grout into all the spaces between our tiles, including those around the outlet. We’ll work in small sections, making sure to fill all voids.
- Cleaning Excess Grout:Immediately after applying grout, we’ll use a damp sponge to wipe away excess from the tile faces and shape the grout lines. We’ll rinse our sponge frequently.
- Wiping Away Haze:After the grout has partially dried (check manufacturer’s instructions, typically an hour or two), a white haze may appear on the tiles. We’ll wipe this away with a clean, dry cloth or a slightly damp sponge.
- Caulking the Countertop Gap:The gap between the bottom row of our backsplash tiles and the countertop should not be grouted. Instead, it should be filled with a color-matched silicone caulk. This allows for expansion and contraction, preventing cracks and providing a waterproof seal.
Making Outlets Blend In: Design and Placement Tips
Even with perfectly cut tiles, a stark white outlet on a dark tile can be an eyesore. We want ourbacksplash tile around outletsto improve our kitchen, not distract from it. Here are some design and placement tips we’ve learned from our 15 years in kitchen and bathroom design at Prime Kitchens And More:
- Color-Matched Outlets and Covers:This is perhaps the simplest and most effective way to make outlets disappear. Standard outlet colors include white, light almond, ivory, brown, gray, and black. We can choose an outlet and cover plate that closely matches our tile color. Brands like Lutron even offer outlets and switches in around 20 different colors, providing excellent options for blending. For example, we’ve used light gray outlets and switches on a light gray tile backsplash to great effect.
- Paintable Outlet Covers:For a truly custom look, some manufacturers like Legrand offer paintable switch and outlet plates. This allows us to paint them to precisely match our backsplash tile, wallpaper, or even shiplap paneling.
- Horizontal Mounting:Traditional outlets are mounted vertically, but mounting them horizontally can help them blend in more effectively. This is especially true if the horizontal orientation fits neatly within the dimensions of your tile. Placing them lower on the backsplash, just above the countertop, also helps them become less conspicuous, often hidden behind small appliances or kitchen decor.
- Under-Cabinet Power Strips:For those who truly want a seamless backsplash, under-cabinet lighting and power systems (like Legrand Adorne) can be an excellent solution. These systems integrate outlets directly into a track mounted discreetly under your upper cabinets, keeping the backsplash free of interruptions. However, a word of caution: while they keep the backsplash clean, trailing cords from plugged-in appliances can sometimes be more unsightly than a well-integrated outlet on the backsplash itself. It can also be inconvenient to bend down to plug things in.
- Relocating or Combining Switches:If a switch is awkwardly placed or interrupts a crucial tile pattern, consider calling an electrician. They can either move the switch to a less conspicuous location (e.g., a side wall) or combine multiple switches into a smaller box using “stacked switches” (like Leviton’s 2-stack or 3-stack options). This can free up valuable backsplash space.
Top 3 Ways to Hide or Blend Outlets:
- Color Match:Select outlets and cover plates that are the same color as your backsplash tile.
- Horizontal & Low Placement:Mount outlets horizontally and closer to the countertop edge, allowing them to be easily concealed by small appliances or decor.
- Under-Cabinet Systems:Use specialized under-cabinet power strips to keep outlets off the backsplash entirely (with consideration for visible cords).
The most important takeaway: plan ahead! Don’t leave outlet and switch placement to the last minute. Incorporating these considerations into your kitchen design from the start will ensure a functional and visually cohesive space.
Frequently Asked Questions about Tiling Around Outlets
We know that tacklingbacksplash tile around outletscan bring up a lot of questions. Here are some of the most common ones we hear from homeowners in Orlando, Winter Park, and throughout Central Florida, along with our expert answers:
What if my new outlet screws are too short after tiling?
This is a very common scenario, and we see it all the time! When you install a new backsplash, you’re adding thickness to the wall with the tile and the adhesive (thin-set mortar or mastic). This extra thickness means the original screws that hold the electrical outlet to the electrical box might no longer be long enough to reach and secure the outlet properly.
The solution is simple: you need to purchase longer 6-32 machine screws. These are readily available at any hardware store or home improvement center. Just make sure they are the correct diameter (6-32 is standard for outlets) and long enough to comfortably reach and fasten the outlet to the electrical box, typically an extra 1/2 inch to 1 inch longer than the originals. This ensures your outlet is securely mounted and safe.
How do you handle mesh-backed mosaic tiles around an outlet?
Mosaic tiles, often sold in sheets with a mesh backing, can be a bit tricky but very manageable around outlets. Here’s our approach:
- Cut the Mesh:First, we’ll generally cut the mesh backing with a utility knife to separate the mosaic sheet into smaller, more manageable sections. This allows us to bring the tiles closer to the outlet opening.
- Individual Pieces (Tesserae):For very precise fits, especially if the outlet opening requires an irregular shape, we might need to use a tile nipper to snip individual mosaic pieces (often called tesserae) into the exact shapes needed. This allows us to create a snug fit around the outlet.
- Cover Plate is Your Friend:1/4-inch overlap we talked about? The outlet cover plate is designed to hide small imperfections. Our goal is to get the mosaic tiles close enough to the outlet box so that the cover plate completely conceals all the cut edges, resulting in a clean and finished look. The fewer pieces a mosaic sheet is cut into, the easier it is to align grout joints, so we try to keep cuts to a minimum while ensuring a good fit.
Can I use peel-and-stick tiles around outlets?
Absolutely! Peel-and-stick tiles are a “miracle for DIYers” and can definitely be used around outlets. The process is similar to traditional tiles, but the cutting methods differ based on the type of peel-and-stick material:
- Flexible (Thin) Peel-and-Stick Tiles:For vinyl or gel-based peel-and-stick tiles, a sharp utility knife or heavy-duty scissors work perfectly. We’ll flip the tile sheet face down, mark the reversed measurements of the outlet box, and then carefully cut out the rectangle.
- Rigid (Thick) Peel-and-Stick Tiles:For more rigid core options like SPC (Stone Plastic Composite) or LVT (Luxury Vinyl Tile), a power tool like an oscillating saw might be needed for cleaner, more precise cuts. Alternatively, for multi-unit patterns like subway tiles, you can use what some call the “Easy Puzzle” method: use a box cutter to separate individual tiles along the simulated grout lines, then trim those smaller pieces to fit.
Regardless of the type, always measure and mark carefully, and remember that the outlet cover plate will hide minor cutting imperfections. This makes peel-and-stick an accessible option for updating yourbacksplash tile around outlets!
Conclusion
Tacklingbacksplash tile around outletsmight seem daunting at first, but as we’ve explored, it’s a completely manageable project with the right approach. By prioritizing safety, understanding building codes, using the correct tools for measuring and cutting, and paying attention to detail in installation and finishing, we can achieve beautiful, professional-looking results.
Remember those DIY savings? Installing your own backsplash can save you between $300 and $1,000 in labor costs, a significant amount that can be reinvested in other home improvements. However, the true value lies in the satisfaction of a job well done.
Our key takeaways for success:
- Safety is paramount:Always turn off and test for power before starting.
- Preparation is key:Extend those electrical boxes to ensure a flush finish.
- Measure precisely:Account for the outlet faceplate overlap in your cuts.
- Choose the right tools:Match your cutting tool to your tile material.
- Blend it in:Use color-matched outlets, horizontal mounting, or other design tricks to make outlets disappear.
For homeowners in Orlando, Orange County, Seminole County, and surrounding areas like Winter Park, Apopka, and Windermere, if the thought of intricate tile cuts and electrical work feels like too much of a challenge, that’s where we come in. At Prime Kitchens And More LLC, we specialize in full house remodeling, with a keen focus on kitchen and bathroom design. With 15 years of experience, our team ensures every detail, including the seamless integration ofbacksplash tile around outlets, is handled with precision and expertise. We use premium materials and deliver high-quality results, ensuring your satisfaction and a truly stunning finish.
For homeowners in Orlando, FL, seeking a perfect, professional finish without the DIY hassle, consider our expert services.Explore our backsplash installation servicesand let us bring your kitchen vision to life.