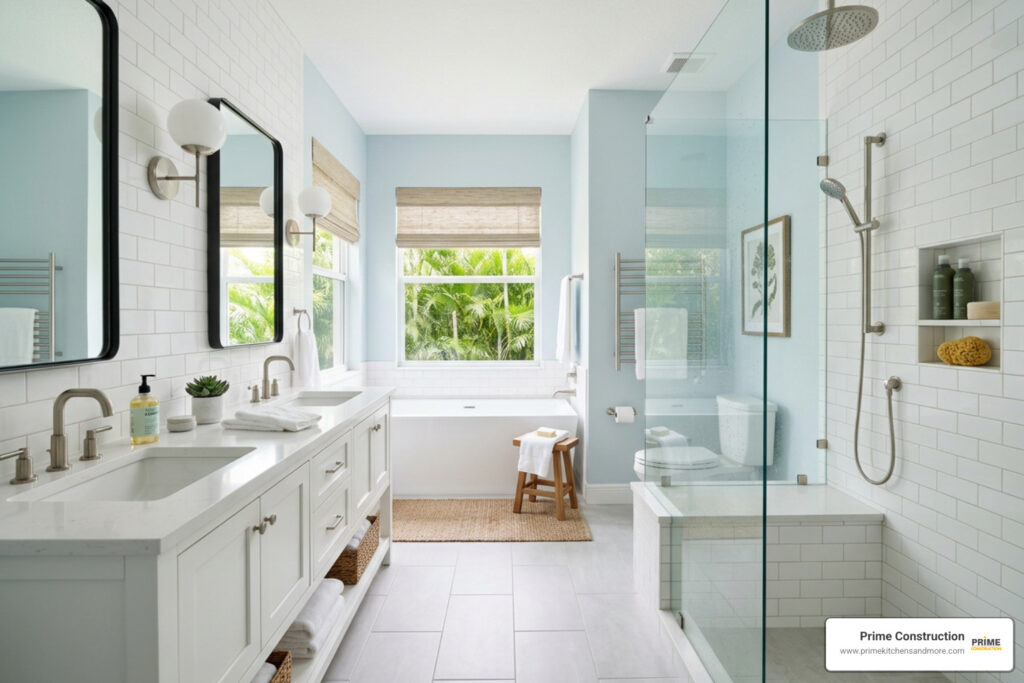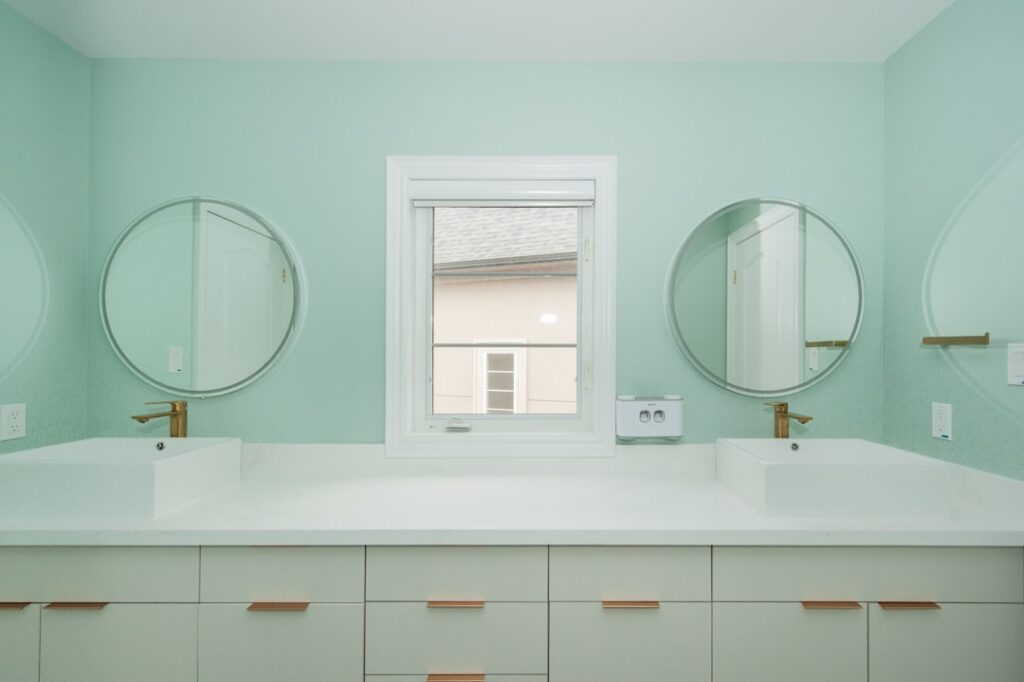

Why Installing a Marble Vanity Top is Easier Than You Think
Install marble vanity top projects might seem intimidating, but they’re surprisingly manageable for most homeowners. Here’s what you need to know:
Quick Installation Overview:
- Turn off water and disconnect plumbing
- Remove old top by cutting caulk and lifting carefully
- Level the vanity base using shims if needed
- Install faucet before placing marble top
- Secure marble top with silicone adhesive
- Reconnect plumbing and test for leaks
- Seal all edges with caulk to prevent water damage
- Apply marble sealer every 3-6 months for protection
According to industry research, marble countertops look amazing and can be installed with basic tools. Pre-fabricated marble slabs typically cost between $200-$500, making this an affordable luxury when you handle the installation yourself.
The key to success is proper preparation. Marble is a rigid material that needs even support – if your vanity base isn’t level, the stone could crack. But don’t worry. This guide covers every detail to help you avoid common pitfalls.
Time required: One day for most installations
Skill level: Intermediate (with careful attention to detail)
Whether you’re updating an outdated bathroom or building new, installing your own marble vanity top can save hundreds in labor costs while giving you that high-end look you want.

Step 1: Gathering Your Tools and Materials
Before you begin, proper preparation is key. Having all your tools and materials ready will save time and frustration, preventing mid-project trips to the hardware store. A smooth and successful install marble vanity top project starts with the right supplies.
First, gather your safety gear and measurement tools. You’ll need safety glasses to protect your eyes and work gloves to keep your hands safe from sharp edges. A tape measure and a level are also crucial. The level is especially important because marble is a rigid stone that doesn’t bend; an unlevel vanity base could cause the top to crack over time.
Next, prepare for the plumbing work. You’ll need an adjustable wrench for supply lines and a pipe wrench for any stubborn drain pipes. Keep a bucket and plenty of rags nearby to catch water when you disconnect the old plumbing.
For securing the new top, you’ll need shims to level the vanity base, a utility knife for cutting old caulk and trimming shims, and a screwdriver (both Phillips and flathead).
For a watertight and secure finish, have a caulking gun with a tube of 100% silicone caulk. This is essential for securing the top to the cabinet and creating a watertight seal around the edges. Choose 100% silicone for maximum durability and water resistance. You’ll also need plumber’s putty to create a tight seal around your new faucet and drain.
Finally, have your new faucet and drain assembly ready. Choose a style that complements your marble and bathroom. Consider getting new supply lines if the old ones look worn. Most importantly, don’t forget the marble sealer. This is a must-have to protect your porous marble from stains and keep it looking pristine.
Having this arsenal ready before you start will make your install marble vanity top project flow smoothly, letting you focus on the task at hand. For more information on finding the perfect accessories for your bathroom, explore our insights on bathroom fixtures.
Step 2: Removing the Old Vanity Top and Plumbing
Alright, with your trusty tools and materials all gathered up, it’s time for the exciting part: making room for your brand-new marble top! This next stage is all about carefully disconnecting the old plumbing and gently detaching the old countertop. Think of it as preparing the canvas for your masterpiece – a bit like surgery, but for your bathroom!

Disconnecting the Water and Drains
Before you even think about touching a wrench, the very first and most crucial step is to turn off the water supply to your vanity. Look under the sink for the shut-off valves (they’re usually red for hot water and blue for cold). Turn them clockwise until they’re completely closed. If you don’t see individual shut-off valves for your vanity, you’ll need to turn off the main water supply to your bathroom, or even your whole house, to be safe.
Once the water is off, open the faucet on your old vanity to relieve any leftover pressure in the lines. This simple trick prevents any unexpected splashes or showers when you start disconnecting things! Now, grab your bucket and place it directly under the P-trap – that’s the U-shaped pipe under the sink. This little bucket will catch any water still lingering in the drain pipes.
Using your pipe wrench, carefully loosen the nuts that connect the P-trap and any other drain pipes. Take your time and be gentle; older pipes can sometimes be a bit fragile. Once those are loose, you can disconnect the P-trap and other drain lines. Finally, use your adjustable wrench to disconnect the water supply lines from the old faucet assembly. For a deeper dive into the tools that make this job easier and safer, be sure to check out our guide on top plumbing tools for homeowners.
Detaching the Old Countertop
With all the plumbing neatly out of the way, it’s time to tackle the old countertop itself. Most vanity tops are held in place by a combination of caulk along the edges, and sometimes hidden clips or adhesive underneath.
Start by grabbing your trusty utility knife. Carefully cut through the caulk seal where the countertop meets the wall and where it sits on the vanity base. Make sure you cut all the way through the caulk to fully break that bond. Next, open up the vanity cabinet doors and peek inside. You’re looking for any securing clips or screws that might be holding the top down. If you find them, use your screwdriver to remove them.
If the old top still feels really stuck, it might be glued down with a strong adhesive. You can try gently prying it up with a pry bar, but be super careful not to damage the vanity cabinet itself. Sometimes, a little patience and gentle persuasion are all it takes. Once it’s loose, carefully lift the old top off the vanity base. If it’s heavy or awkward, don’t hesitate to ask a friend for an extra set of hands!
After the old top is gone, take a moment to thoroughly clean the top surface of the vanity base. You want to remove any old caulk, adhesive residue, dust, or debris. Mineral spirits or paint thinner can be helpful for those stubborn adhesive spots. A clean, smooth, and clear surface is absolutely essential for your beautiful new install marble vanity top to sit perfectly flat and secure.
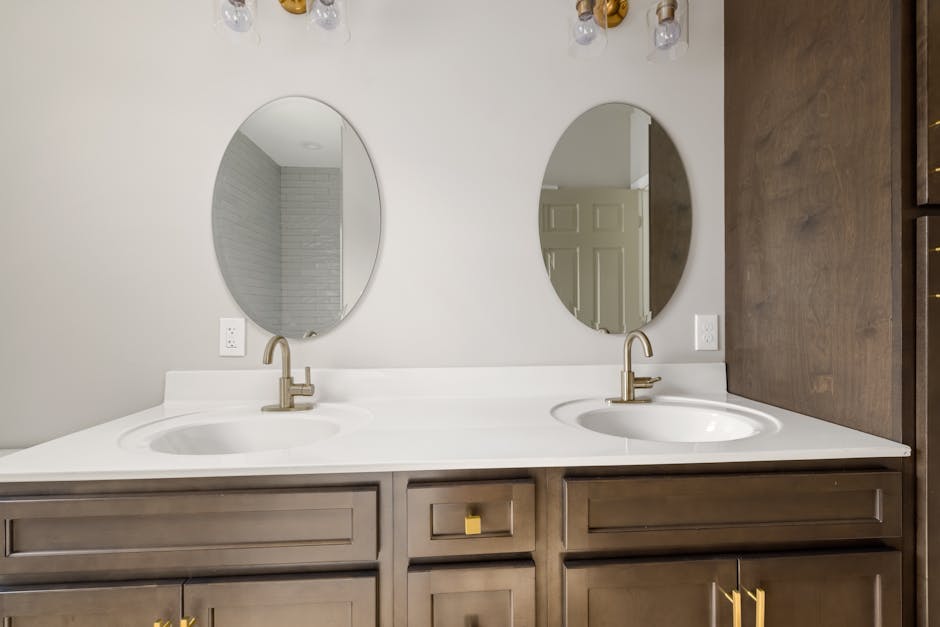
Step 3: How to Prepare and Install Marble Vanity Top
Now, we’ve reached the heart of your project: fitting and securing that gorgeous new marble top. This is a super important phase. Taking your time here makes all the difference! Ensuring the base is perfectly level and the top is just right will save you from future headaches like cracks or water damage. Marble is beautiful, but it needs a solid foundation.

Ensuring the Vanity Base is Level and Stable
Before you even think about placing that heavy, beautiful marble top, you must make sure your vanity base is perfectly level and super stable. Marble is a very rigid material. It doesn’t flex much at all. So, if your cabinet isn’t flat, that unevenness will put stress on the stone. This can easily lead to cracks or breaks down the road. We definitely don’t want that!
Grab your level and place it on the top surface of the vanity base. Check it in every direction: front-to-back, side-to-side, and even diagonally. If you spot any gaps or notice a wobble, it’s time for shims. Insert shims underneath the cabinet where you see those gaps. You might need them at the front, back, or sides. The goal is a perfectly flat and level surface. Once the cabinet is solid and level, use your utility knife to carefully trim any excess shim material that sticks out. Finally, give the vanity a good, firm wiggle. This helps confirm stability. You want it rock-solid and ready to hold that heavy marble. This step is the secret to a successful and long-lasting install marble vanity top project.
The Dry-Fit and Faucet Installation
Okay, here’s the exciting part – the dry-fit! Gently lift your new marble top and carefully place it onto the leveled vanity base. This step is vital for checking the fit before you use any glue. See how it fits against the wall. Are there any big gaps? Also, confirm that the overhang is even on all sides, both front and sides. If you notice the top needs a tiny adjustment for a better fit, now’s the time to mark it. But with pre-made tops, you usually won’t need to cut anything.
Here’s a clever trick: it’s almost always easier to install your new faucet and drain assembly now, before you permanently attach the marble top. Why? Because you’ll have so much more room to work! No more cramped maneuvering inside the cabinet. Simply apply plumber’s putty around the base of the faucet and the drain flange. Then, gently insert them into their holes in the marble top. Tighten the mounting nuts and connect the supply lines to the faucet. After that, secure the drain assembly following the directions that came with it. A quick but crucial tip: when you’re tightening the drain, do not overtighten it. Too much force can crack the marble. A snug fit with plumber’s putty is all you need for a good seal. For more helpful advice on getting this just right, check out these tips for vanity top installation. And while you’re at it, you might also want to explore custom bathroom cabinets to perfectly complement your new top!
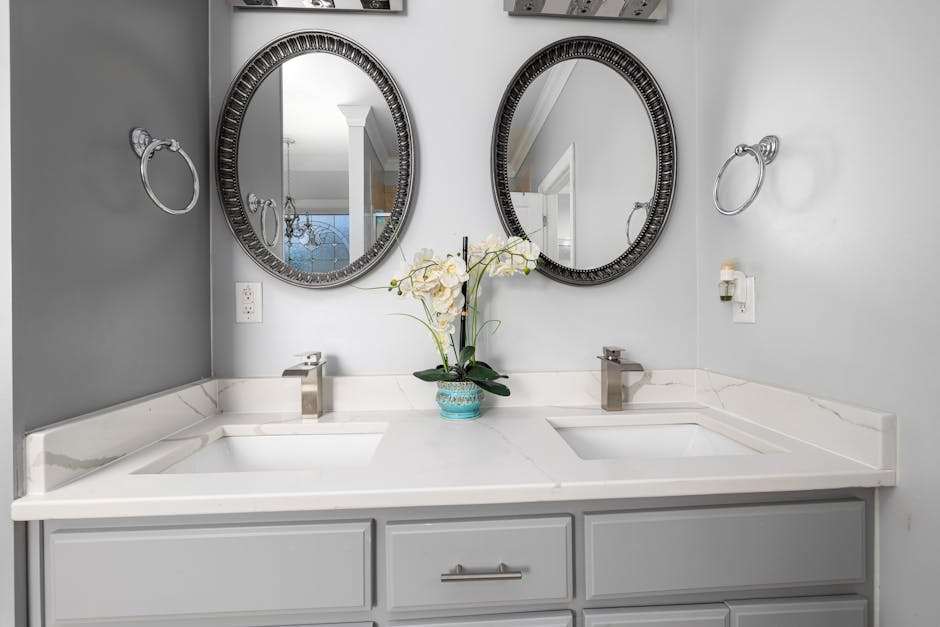
How to Secure and Install Marble Vanity Top
Once your dry-fit looks perfect and your faucet and drain are installed, it’s time to permanently secure that marble marvel! Very carefully remove the marble top from the vanity base and set it aside in a safe spot.
Now, grab your caulking gun. Apply a generous bead of 100% silicone caulk all along the top edges of the vanity cabinet. This silicone does double duty. It acts as a strong adhesive, holding your top securely, and it also provides a soft cushion. This cushion helps absorb any tiny uneven spots and gives vital support to the rigid stone.
With the silicone ready, carefully lift the marble top back into position on the vanity base. Take your time to align it perfectly. Make sure the overhang is even and that it sits flush against the wall. Once it’s in just the right spot, press down firmly along the entire surface. This ensures good contact with the silicone. If any excess caulk squeezes out, don’t worry! You can clean it immediately with a damp rag or even your finger for a smooth, neat finish. This method of securing your top ensures both great stability and a lasting bond. Your beautiful new surface will stay exactly where it belongs for years to come!
Step 4: Final Connections and Sealing
With the top secured, the final steps involve reconnecting the plumbing and creating a watertight seal around all edges. This protects both your new countertop and the vanity cabinet from moisture, ensuring your hard work lasts for years to come. Think of this as the victory lap of your install marble vanity top project!

Reconnecting the Plumbing
Now comes the moment of truth – bringing water back to your beautiful new setup! Don’t worry, reconnecting the plumbing is much easier than it sounds. It’s basically just reversing what you did earlier, but with the satisfaction of knowing you’re almost done.
Start by connecting the new supply lines to the underside of your faucet. Here’s a pro tip that can save you headaches: always hand-tighten these connections first. This ensures they’re properly aligned and not cross-threaded. Once they feel snug by hand, use your adjustable wrench for that final turn. Tight is good, but overtight can crack fittings or damage threads.
Next, reattach the P-trap to both the drain assembly and the wall drain pipe. Again, hand-tighten first, then use your pipe wrench for the final adjustment. The P-trap might feel a bit awkward to maneuver, but take your time – there’s no rush at this point.
Before you celebrate, turn the water supply back on slowly. Whether you’re turning on the shut-off valves under the sink or the main supply, go easy. Turn on the faucet to test both hot and cold water flow, and here’s the important part: watch like a hawk for any leaks. Even a tiny drip can become a big problem over time, so don’t skip this step. A small leak now is much easier to fix than water damage later!
How to Properly Seal and Install Marble Vanity Top Edges
This final sealing step is absolutely crucial for protecting your investment. Water is sneaky – it finds the tiniest gaps and can cause serious damage to both your beautiful marble and the cabinet underneath. But with the right approach, you’ll create a watertight barrier that keeps everything pristine.
Using your caulking gun, apply a continuous bead of caulk along the backsplash where your marble top meets the wall. Don’t rush this part – a steady, even bead looks much more professional than a wobbly line. If you have a separate backsplash piece, you’ll also need to caulk the gap between the top and wall where they meet.
Here’s a trick that makes all the difference: wet your finger (or use a caulk-smoothing tool if you have one) and gently run it along the fresh caulk bead. This creates that smooth, professional finish you see in high-end bathrooms. The motion should be confident and continuous – think of it like frosting a cake.
Once you’ve smoothed all the caulk lines, step back and admire your work! But remember, let the caulk cure completely before using the sink. This usually takes 24 to 48 hours, depending on humidity and temperature. Yes, it’s tempting to test everything right away, but patience here ensures a lasting seal.
Your marble vanity top installation is now complete, and you should feel proud of this accomplishment. You’ve just added significant value and beauty to your bathroom while saving hundreds in labor costs!
Step 5: Care and Maintenance for Your Marble Vanity
Congratulations on successfully completing your install marble vanity top project. To keep your new surface looking its best, proper care is essential. Marble is a porous, natural stone that is sensitive to acidic substances, so regular cleaning and sealing are crucial for its longevity.
Daily Cleaning and Stain Prevention
Because marble is primarily made of calcium carbonate, it reacts poorly to acids. Avoid harsh or acidic cleaners, including products with vinegar, lemon juice, or abrasive chemicals, as they can etch the surface and leave dull spots.
For daily cleaning, use a mild, pH-neutral soap (like dish soap) and water with a soft cloth or sponge. The most important rule is to wipe spills immediately! Marble’s porosity means liquids can quickly seep in and cause stains. If you spill makeup, perfume, or anything with color, gently blot it up immediately; do not wipe, as that can spread the stain. This quick action will prevent most stains and keep your marble looking pristine. For more tips on giving your bathroom surfaces an upgrade, you can always explore our insights on upgrading bathroom countertops.
Sealing Your Marble
Sealing your marble is your best defense against stains. It creates an invisible barrier that repels liquids, giving you more time to clean up spills before they soak into the stone.
We recommend sealing your marble approximately every three to six months, depending on usage and the specific type of marble. The process is simple: ensure the surface is clean and completely dry, then apply a thin, even layer of a high-quality marble sealer. Let it penetrate the stone for about three to five minutes before wiping off any excess. Always follow the product’s instructions for curing times and reapplication. This small effort will protect your investment for years to come. For more detailed guidance, including general advice on installation and long-term care, refer to A guide to installing bathroom vanity tops.
Frequently Asked Questions about Marble Vanity Installation
Even with the most detailed guide, questions always pop up during a marble vanity installation project. Don’t worry – you’re not alone! Here are the most common concerns we hear from DIY enthusiasts tackling this rewarding upgrade.
What if there’s a gap between the vanity top and the wall?
Take a deep breath – this happens to almost everyone! Small gaps between your vanity top and the wall are completely normal due to slight imperfections or unevenness in bathroom walls. Most homes have walls that aren’t perfectly straight, especially in older houses.
For gaps up to about 1/4 inch, you can easily fill them with a neat bead of paintable or clear silicone caulk. Choose clear silicone for a seamless look, or pick a color that matches your wall or marble. The key is applying it smoothly and tooling it with your finger for a professional appearance.
If you’re dealing with a larger gap (more than 1/4 inch), consider installing a matching marble side splash. This not only covers the gap beautifully but also gives your vanity that custom, high-end look you see in designer bathrooms. It’s like adding the perfect finishing touch to a beautiful outfit!
How do I avoid cracking the marble when tightening the drain?
This is probably the question that keeps most DIYers up at night, and for good reason. Marble is gorgeous but can be unforgiving if you get too aggressive with the wrench.
The secret is understanding that the plumber’s putty or silicone under the drain flange creates the seal, not excessive pressure. When you install marble vanity top drains, tighten the drain assembly by hand until it feels snug and secure. Once you feel that resistance, use your wrench for just a quarter-turn more – that’s it!
Think of it like opening a jar of pickles. You want it tight enough to stay put, but you don’t need to hulk out on it. Over-tightening can create hairline cracks that might not show up immediately but can grow over time, turning your beautiful investment into a costly mistake.
Can I cut a marble vanity top myself?
While we love a good DIY challenge, cutting marble is best left to professionals if you’re inexperienced with stone work. Marble is a delicate material that requires specialized tools like a wet saw with a diamond blade, plus the know-how to use them properly.
One wrong move and you could end up with chips, cracks, or breaks that turn your dream project into a nightmare. The dust created during cutting also requires proper ventilation and safety equipment.
Here’s the good news: most pre-fabricated marble tops come in standard sizes specifically designed to fit common vanity cabinet dimensions. This means you can usually avoid custom cutting altogether by choosing the right size from the start.
If your project absolutely requires custom cuts for an unusual space, we highly recommend consulting with a stone fabricator. It might cost a bit more upfront, but it’s much less expensive than replacing a cracked marble top!
Conclusion
Whew! You’ve made it to the end, and by now, you probably feel like a seasoned pro when it comes to home improvements. Installing a marble vanity top is truly a rewarding project, isn’t it? It’s amazing how a new top can dramatically improve your bathroom’s style and function. From carefully disconnecting those old pipes to getting the base perfectly level and sealing every edge with care, each step you take helps create a stunning, long-lasting result. The feeling of changing your bathroom with such a beautiful material is something truly special!
But hey, we totally get it. Maybe you don’t have the extra time, all the right tools, or simply the inclination for a big DIY renovation right now. And that’s perfectly okay! If you’re in the Orlando area and dreaming of a flawless, professional touch for your bathroom remodeling project, the experienced team at Prime Kitchens And More LLC is more than ready to lend a hand. With 15 years of expertise in kitchen and bathroom design, we pride ourselves on offering personalized service and using only premium materials. This means you get high-quality results, ensuring your dream bathroom becomes a reality without any of the stress of doing it yourself. You can relax while we handle every single detail!
Ready to truly transform your bathroom without lifting a finger? Don’t hesitate! Contact us for expert bathroom vanity installation in Orlando. Let’s make your vision come to life.