Why Your Painted Walls Aren’t a Deal-Breaker for That Dream Backsplash
Can you install backsplash on painted drywall? Yes, you absolutely can—but only if you prepare the surface properly. Skipping preparation steps will lead to tiles falling off, wasted money, and a frustrating do-over.
Quick Answer:
- Yes, it’s possible to tile directly over painted drywall in kitchens and other low-moisture areas
- Preparation is mandatory: You must clean, sand, patch, and often prime the painted surface
- The right adhesive matters: Thin-set mortar works better than mastic on painted surfaces
- Paint type affects success: Glossy paint requires more sanding than matte finishes
- Your timeline: Proper prep adds 1-2 days but prevents costly failures
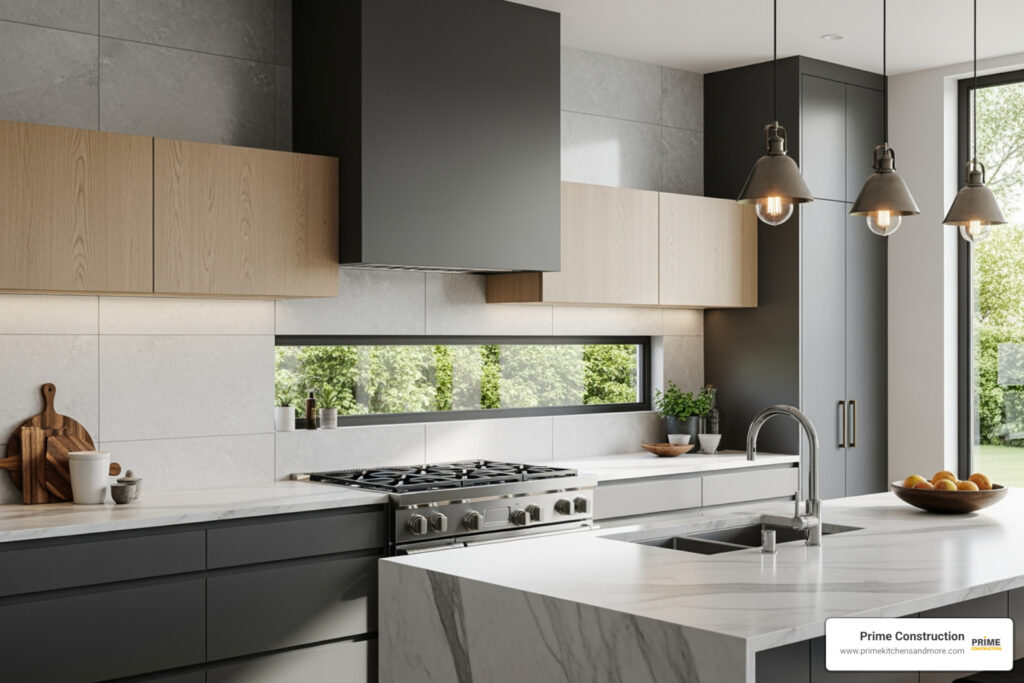
If you’re planning a kitchen refresh in the Orlando area, you’ve probably looked at your existing painted walls and wondered if you need to rip them out before installing that beautiful new backsplash. The good news? You likely don’t need to start from scratch.
The challenge isn’t the paint itself—it’s ensuring your tiles actually stay on the wall. According to industry standards, the bond of your tile to the wall will only be as strong as the bond of the paint to the drywall. If that paint peels, your expensive tile installation goes with it.
This guide walks you through exactly how to prepare painted drywall for a backsplash that lasts. We’ll cover the risks of cutting corners, the step-by-step prep process, choosing the right materials, and installation basics. Whether you’re a confident DIYer or exploring your options before calling in the pros, you’ll understand what it takes to get professional results.

For more detailed information on specific aspects of this project, you can explore our related guides on backsplash installation, the fundamentals of kitchen tile setting, and how to work with backsplash tile around outlets.
The Foundation of a Flawless Backsplash: Why Prep is Non-Negotiable
When we start on a kitchen remodel, especially one involving a new backsplash, the excitement of choosing tiles can sometimes overshadow the crucial first step: preparing the canvas. However, we’ve learned through years of experience in the Orlando, FL area that the success and longevity of any tile installation, particularly when asking can you install backsplash on painted drywall, hinges almost entirely on meticulous preparation.
Imagine spending time and money on beautiful tiles, only to have them pop off the wall weeks or months later. This isn’t a horror story; it’s a common outcome of inadequate surface prep. The goal is always to create a flat, dry, solid, structurally sound surface firmly attached to the wall studs with no flexibility or movement.
The risks of skipping preparation are manifold. Poor adhesion is the most obvious, leading to tiles literally falling off the wall. This can be due to the paint’s weak bond to the drywall, moisture issues compromising the drywall paper, or simply the weight of the tiles pulling everything down. Textured walls and glossy paint finishes further complicate matters, as they don’t provide the necessary “bite” for adhesives to grip properly.

Understanding the Risks of Tiling Over Unprepared Paint
The biggest adversary when you install backsplash on painted drywall is moisture, especially from adhesives. Many standard tile glues, particularly mastic, are water-based. When these are applied directly to painted drywall without proper preparation, the water in the adhesive can have disastrous effects.
Here’s the breakdown of what can go wrong:
- Paint Peeling: The paint itself might not be strongly bonded to the drywall. If the adhesive’s moisture penetrates the paint layer, it can weaken this bond, causing the paint to peel, taking your tiles with it.
- Weakened Drywall Paper: Drywall’s top layer is paper. Mastic tile glue, being saturated with water, can wet this drywall paper. This weakens it significantly, damaging it in the process of adhesion. If you’ve also primed or painted the drywall, the moisture can cause the primer or paint layer to detach from the weakened drywall paper, leading to the entire tile installation failing.
- Falling Tiles: When the paint bond fails or the drywall paper is compromised, the tiles lose their anchor. We’ve seen instances where tiles literally droop off the wall or peel off overnight. This isn’t just frustrating; it’s a complete waste of your investment in both materials and labor.
- Wasted Investment: A failed backsplash means you’ll have to tear down the old work, clean up the mess, and buy new materials—effectively paying for the project twice.
The bottom line is that the bond of your tile to the surface will only be as good as the bond of the paint to that surface. If the paint is old, flaky, or not well-bonded, it must be addressed.
Dealing with Different Paint Finishes and Textures
Not all painted drywall is created equal when it comes to tiling. The type of paint and any existing wall texture significantly impact the preparation required.
- Textured Walls: Many homes in the Orlando area might have textured drywall. Tiling directly over a textured surface is a recipe for disaster. The texture prevents the tile adhesive from making full contact with the wall, leading to weak spots and potential tile failure. We need to scrape the wall to remove the texture and give it a flat appearance.
- Glossy vs. Matte Paint: Glossy paints, with their smooth, non-porous finish, offer very little for tile adhesive to grip onto. It’s like trying to stick a sticker to a pane of glass – it might hold for a bit, but it won’t last. Matte or flat paints are slightly more forgiving, but still require attention.
- Emulsion, Limewash, or Distemper Paints: According to British Standards, walls coated with these types of paints are generally unsuitable for tiling. These paints can prevent adhesives from sticking properly, leading to failure. If you suspect your wall has these, a more aggressive approach to paint removal might be necessary.
- Creating a Mechanical Bond: The key is to create a “tooth” or rough surface for the adhesive to grab onto. This is where sanding comes in. Using 80 to 120 grit sandpaper, we sand the entire surface until the shine of the paint disappears. This roughens the surface, allowing the thin-set mortar (or mastic, if properly used) to hold fast.
- Flat Surface Importance: Beyond texture, any significant imperfections deeper than 1/16 inch need to be addressed. These can lead to uneven tile installation, cracked grout, and an overall unprofessional look. We’ll cover patching these in the next section.
Your 4-Step Guide to Prepping Painted Drywall for Tile
Now that we understand why preparation is so critical, let’s roll up our sleeves. This 4-step guide will walk you through changing your painted drywall into the perfect substrate for a long-lasting backsplash. Safety first! We always recommend wearing safety glasses, masks, gloves, and protecting surrounding areas with drop cloths.
If you are curious about the chemistry behind cleaners and primers used in this process, resources like the latex paint and primer (paint)) articles on Wikipedia provide useful background on how these products interact with painted drywall.

Step 1: Clean and Degrease the Surface
Before any sanding or patching begins, a thorough cleaning is paramount. Kitchen walls, especially in the backsplash area, are notorious for accumulating grease, food splatters, and general grime. Adhesives won’t stick to dirty surfaces, plain and simple.
- Degreasing Agents: We use a powerful degreaser, such as TSP (trisodium phosphate) or an ammonia-based cleaner, mixed according to the manufacturer’s instructions.
- Wiping Down the Wall: Using a sponge or rag, we carefully wipe down the entire area where the backsplash will be installed. For stubborn grease, a scrub brush might be needed. Our goal is to remove all oils, grease, and any other marks that could prevent the adhesive from bonding.
- Drying Time: After cleaning, we allow the wall to air dry completely. This is crucial; applying anything to a damp surface can lead to adhesion problems down the line.
Step 2: Scuff and Sand for Superior Grip
This step is where we create that essential “tooth” for the adhesive.
- Scraping and Sanding: If your wall has any texture (like knockdown or orange peel), we’ll start by scraping it down to create as flat a surface as possible. Then, for all painted surfaces, we’ll use 80 to 120 grit sandpaper to sand the entire area. The goal isn’t to remove all the paint, but to remove its sheen and create a uniformly dull, roughened surface. This allows the tile adhesive to get a strong mechanical grip.
- Dust Removal: Sanding generates a lot of dust. We thoroughly vacuum the wall and surrounding areas, then wipe it down with a damp cloth to remove any lingering dust particles. Adhesives struggle to bond with dusty surfaces.
Step 3: Patch and Repair Imperfections
A perfectly flat surface is key for a professional-looking tile installation. Any dips, bumps, or holes will show through your finished backsplash.
- Spackling Compound: We use a good quality spackling compound or joint compound to fill any holes, cracks, or divots in the drywall. For imperfections deeper than 1/16 inch, this step is non-negotiable.
- Creating a Flat Plane: We apply the compound, ensuring it’s flush with the surrounding wall surface. Once dry, we sand the patched areas smooth, blending them seamlessly with the rest of the wall.
- Repeat: For larger imperfections, multiple thin coats might be necessary, with sanding between each coat. Again, vacuum and wipe away dust after sanding.
Step 4: Prime for a Water-Resistant Bond
Priming serves multiple critical functions when you install backsplash on painted drywall.
- Sealing the Drywall: Primer seals the drywall paper, protecting it from the moisture in tile adhesives. This is especially important if you’ve sanded through the paint in spots.
- Improved Adhesion: Many primers are designed to promote better adhesion for subsequent layers, creating a stronger bond between your prepped wall and the tile adhesive.
- Moisture Barrier: A good quality water-resistant primer adds an extra layer of protection against incidental moisture, which is always a good idea in a kitchen environment, even if it’s not a “wet area” like a shower.
- Oil-Based Primer Benefits: For an added layer of protection, particularly if you’re using a water-based adhesive like mastic (though we generally recommend thin-set, as discussed below), an oil-based primer can be beneficial. It provides just enough of a moisture barrier to prevent water from the adhesive from penetrating the wall while the mastic is drying, which helps avoid separation. However, it’s crucial to note that an oil-based primer does not suffice as a barrier in a shower or other genuinely wet areas.
- Ensuring Longevity: We allow the primer to dry and cure fully according to the manufacturer’s instructions, which can sometimes take 24 hours or more. For newly painted surfaces, we ensure at least 4 weeks for the paint to fully cure before proceeding with any backsplash installation. This patience pays off in the long run.
Can You Install Backsplash on Painted Drywall? Choosing the Right Materials
Once your painted drywall is carefully prepped, the next crucial step is selecting the right materials for your backsplash. This involves choosing the appropriate adhesive and considering the type of tile you’ll be using.
Adhesives: Thin-Set Mortar vs. Mastic
The adhesive you choose is paramount, especially when tiling over painted drywall. While both thin-set mortar and mastic are used for tiling, their properties differ significantly, impacting their suitability for this specific application.
| Feature | Thin-Set Mortar | Mastic Tile Adhesive |
|---|---|---|
| Composition | Cement-based, mixed with water or latex additive | Organic, water-based, pre-mixed paste |
| Curing Process | Chemical reaction (hydrates) | Air drying (water evaporates) |
| Water Content | Water is chemically bound during curing | High water content that must evaporate |
| Bond Strength | Strong, rigid, durable bond | Strong initial tack, but less rigid over time |
| Moisture Impact | Less likely to weaken drywall paper | High risk of weakening drywall paper due to water saturation |
| Weight Support | Excellent for heavy tiles | Not recommended for heavy tiles |
| Flexibility | Less flexible | More flexible (can be good for some applications, but not ideal for stability) |
| Recommended Use | Most tile types, wet areas (with proper backer) | Light tiles, dry areas, but with caution on painted drywall |
| Our Recommendation | Recommended for painted drywall backsplashes | Use with extreme caution on painted drywall; generally not recommended. |
Why Thin-Set Mortar is Preferred: Thin-set mortar undergoes a chemical curing process, meaning the water in the mix is chemically bound rather than simply evaporating into the substrate. This significantly reduces the risk of moisture saturation and weakening of the drywall paper or paint bond, which is a major concern with mastic. It provides a much more rigid and durable bond, essential for a long-lasting backsplash.
Why Mastic is Risky: As we discussed, mastic’s high water content can easily saturate and weaken drywall paper and paint layers. While some manufacturers claim certain mastics can be used on painted drywall, we generally advise against it for backsplashes in kitchens, which, while not “wet areas,” can still experience splashes and humidity. If mastic is your only option, ensure the drywall is impeccably primed with an oil-based primer, and allow for extended drying times.
Substrate Showdown: Is Your Drywall Right for the Job?
While we’re discussing can you install backsplash on painted drywall, it’s important to understand the different types of drywall and when other substrates might be a better choice.
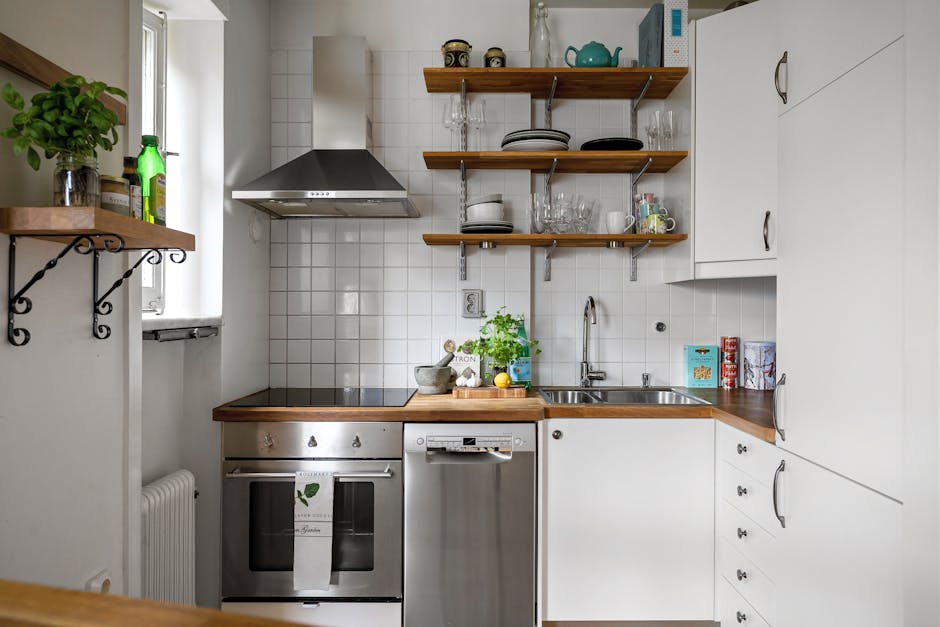
- Standard Drywall: For typical kitchen backsplashes, standard drywall is perfectly acceptable if properly prepared. Kitchens are not considered “wet areas” in the same way showers or tub surrounds are, so they don’t strictly require a cement board.
- Moisture-Resistant Green-Board: For new construction or a major remodel, especially in kitchens, we recommend using moisture-resistant green-board drywall. This type of drywall has a water-resistant coating and often contains additives to reduce mold growth. It offers an extra layer of protection against incidental moisture and humidity, making it an excellent choice for a kitchen backsplash.
- Cement Board (CBU): Cement board is a superior substrate for tiling due to its excellent water resistance and stability.
- Pros: Impervious to water damage, extremely stable, provides a rigid surface, excellent for heavy tiles, ideal for wet areas.
- Cons: More expensive, heavier, more difficult to cut and install, adds thickness to the wall.
- When to Use Backer Board: While not strictly necessary for a kitchen backsplash (a vertical, relatively dry area), cement board is always a safer, more durable option. If you’re concerned about the long-term integrity, or if your walls are particularly uneven and you need to build them out, replacing the drywall with cement board can be a wise choice. For areas like showers or outdoor kitchens, cement board is mandatory.
- Kitchens vs. Wet Areas: This distinction is key. A kitchen backsplash sees splashes, but it’s not constantly saturated like a shower. This is why properly prepped drywall is often sufficient. However, for maximum peace of mind and durability, especially in high-use kitchens, cement board is always a premium choice.
Tile Types and Considerations for Painted Drywall
The type of tile you choose also plays a role in the success of your backsplash installation over painted drywall.
- Ceramic Tile: A popular and versatile choice. Ceramic tiles are relatively lightweight and adhere well to properly prepared drywall with thin-set mortar. They come in a vast array of colors, sizes, and patterns.
- Porcelain Tile: More durable and less porous than ceramic, porcelain is an excellent choice. It’s slightly heavier but still well within the capacity of properly prepared drywall. Porcelain is also great for high-use areas due to its ease of cleaning.
- Natural Stone (Marble, Granite, Travertine): Natural stone tiles are beautiful but can be significantly heavier than ceramic or porcelain. While possible to install on drywall, ensure your thin-set is rated for heavy tile and that your wall is structurally sound. Natural stone also requires sealing, both before and after grouting, and regular maintenance.
- Glass Tiles: Glass tiles are popular for their reflective qualities. They are generally lighter, but their translucency means that the adhesive and substrate can sometimes show through. For glass tiles, we often recommend using a white thin-set mortar to prevent discoloration and ensure a uniform appearance.
- Tile Weight: Always consider the overall weight of your chosen tiles. While drywall can support a fair amount, extremely heavy tiles might warrant the extra step of installing cement board for added structural integrity, especially if the wall studs are not perfectly spaced or the drywall is older.
From First Tile to Final Seal: A Quick Installation Guide
With your drywall perfectly prepped and your materials chosen, it’s time for the exciting part: seeing your backsplash come to life! This guide provides a general overview of the installation process.
Laying Out and Setting Your Tiles
A well-planned layout is crucial for a professional finish.
- Finding the Center: We start by finding the center of your backsplash area. This helps ensure a balanced look and minimizes awkward cuts at the ends. We’ll often dry-lay tiles on the countertop or floor to visualize the pattern and make any necessary adjustments.
- Using a Ledger Board: For the first row of tiles, especially if starting above a countertop that isn’t perfectly level, we use a ledger board. This is a straight piece of lumber temporarily screwed to the wall, perfectly level, to support the tiles while the adhesive dries. This prevents the first row from sliding down and ensures a straight baseline.
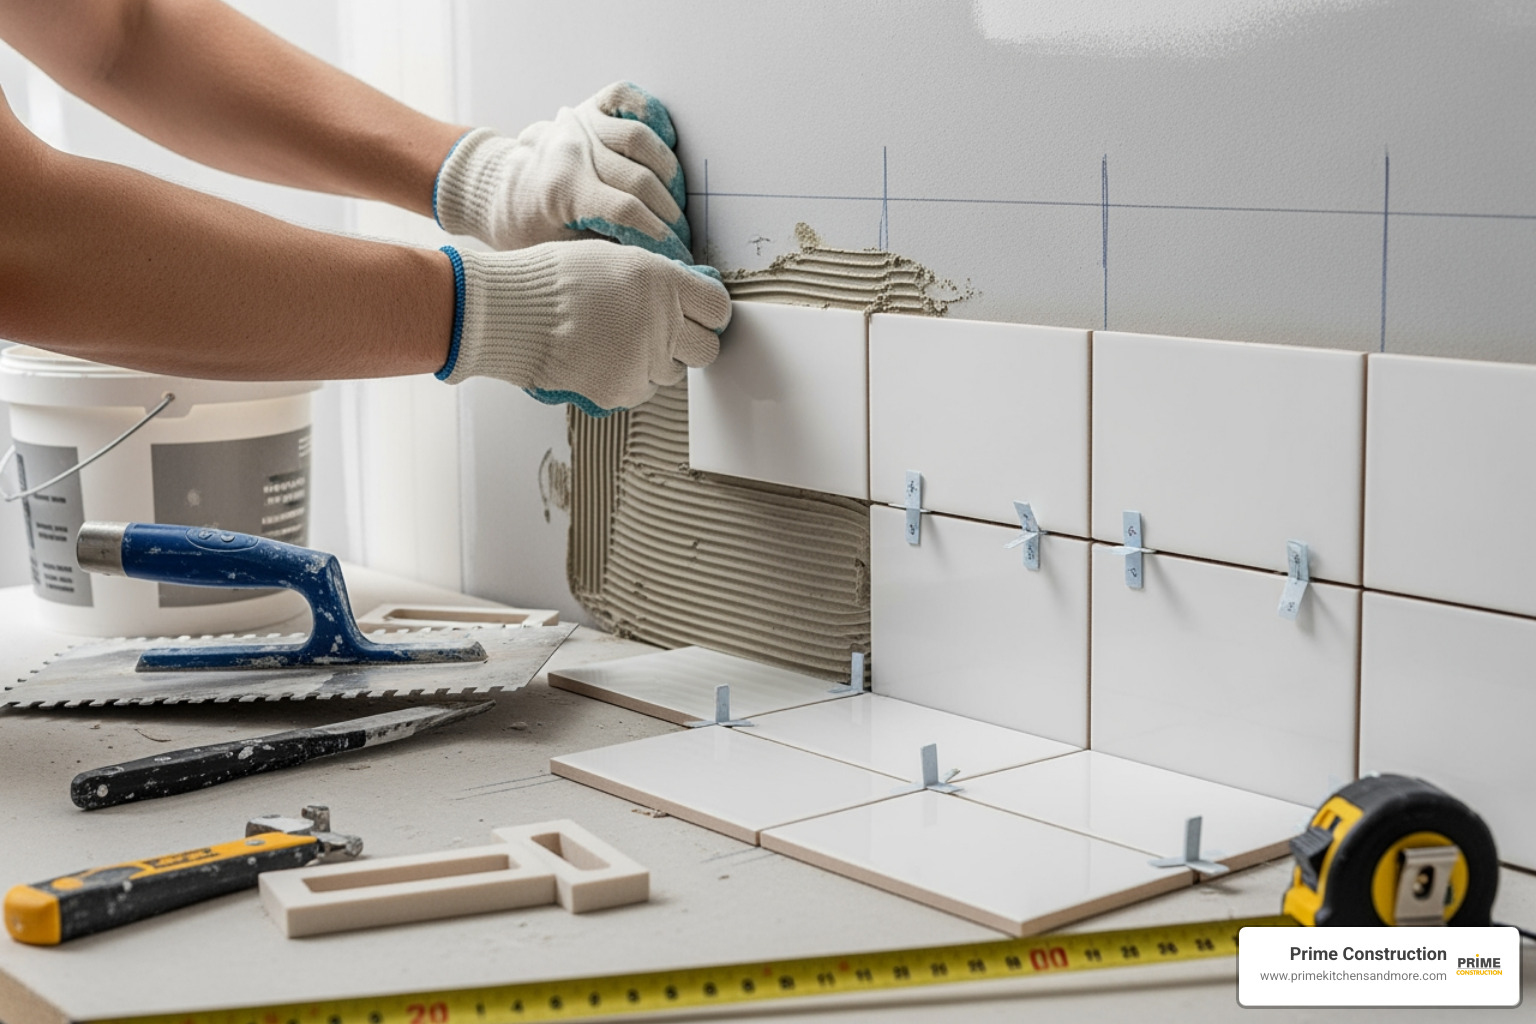
- Applying Adhesive: We work in small sections, typically 2×2 or 3×3 feet, applying thin-set mortar to the wall with a notched trowel. The size of the notches depends on your tile size. We spread the adhesive evenly, then comb it with the notched side to create ridges, which helps the tile bond.
- Pressing Tiles Firmly: We place the first tile, pressing it firmly into the adhesive with a slight twisting motion to ensure full contact. We use tile spacers to maintain consistent grout lines between tiles.
- Cutting Tiles: As we approach corners or ends, tiles will need to be cut. We use a tile cutter for straight cuts and nippers or a wet saw for more intricate shapes, like around outlets. Remember to always wear safety glasses when cutting tiles!
Grouting, Sealing, and Finishing Touches
Once your tiles are set and the adhesive has fully cured (typically 24 hours), it’s time to grout.
- Mixing Grout: We mix the grout according to the manufacturer’s instructions, aiming for a consistency similar to peanut butter.
- Applying with a Grout Float: Using a rubber grout float, we spread the grout diagonally across the tiles, pressing it firmly into the joints to ensure they are completely filled.
- Cleaning Excess Grout: After about 10-15 minutes (check manufacturer guidelines), the grout will begin to set. We use a damp sponge, wiping diagonally across the tiles, to clean off the excess grout. Rinse the sponge frequently. A slight haze may remain, which can be cleaned with a haze remover once the grout is fully dry.
- Grout Sealing Importance: Once the grout is completely dry (usually 24-72 hours), we apply a grout sealer. This protects the grout from stains and moisture, making it easier to clean and prolonging its life, especially important in a kitchen.
- Caulking Expansion Gaps: Where the tile meets the countertop, cabinets, or adjacent walls, we fill these expansion gaps with a high-quality silicone caulk. This provides a flexible, waterproof seal.
- Outlet Extenders: Don’t forget about your electrical outlets! We install electrical box extenders to bring the outlets and switches flush with the new tile surface, then replace the outlet and switch covers for a clean, finished look.
Frequently Asked Questions about Tiling on Painted Drywall
We often get questions from homeowners in the Orlando area about the specifics of tiling over painted drywall. Here are some of the most common ones:
Do I really need to sand the paint before tiling?
Yes, sanding is absolutely crucial. We cannot stress this enough! When you install backsplash on painted drywall, the paint’s smooth, often glossy, surface doesn’t provide enough friction for tile adhesive to properly grip. Sanding removes the paint’s sheen and creates a rough texture, or “tooth,” for the adhesive to mechanically bond to. This ensures your tiles don’t rely solely on the paint’s bond to the wall, which is often weaker than the adhesive’s bond to the roughened paint. Skipping this step is one of the most common reasons for backsplash failure.
What is the best type of drywall for a kitchen backsplash?
For new construction or a major remodel, moisture-resistant drywall, often called “green-board,” is the best choice for kitchens. While kitchens aren’t typically considered “wet areas” like showers, they do experience splashes, spills, and humidity. Green-board offers added protection against incidental moisture and helps to reduce the risk of mold and mildew compared to standard drywall. If you’re tiling over existing standard drywall, proper preparation (cleaning, sanding, patching, and priming with a water-resistant primer) is key to achieving a durable result.
A Lasting Finish for Your Kitchen
Tackling a backsplash installation, especially when you can you install backsplash on painted drywall, might seem daunting at first. However, by understanding the “why” behind each preparation step and committing to doing the work correctly, you can achieve beautiful, long-lasting results. The key takeaways are simple: preparation is paramount, the right adhesive (thin-set mortar) is your best friend, and patience throughout the process will yield a backsplash you’ll love for years.
A successful DIY project is incredibly rewarding, but sometimes, life in the busy Orlando, FL area calls for professional expertise. For a guaranteed professional result on your kitchen remodel, bathroom design, or backsplash installation project, consider the experienced team at Prime Kitchens And More. We specialize in changing spaces with premium materials and meticulous craftsmanship.