Why Kitchen Tile Setting Success Starts with the Right Approach
Kitchen tile settingtransforms any Orlando kitchen from ordinary to extraordinary. Getting it right means understanding the process, having the right tools, and following proven techniques that prevent costly mistakes.
Essential Kitchen Tile Setting Steps:
- Prepare the surface– Clean walls, turn off power, remove outlet covers
- Plan your layout– Find the focal point, mark reference lines, dry-fit tiles
- Apply adhesive– Use thinset or mastic, work in small sections
- Set tiles– Press firmly with spacers, back-butter natural stone
- Grout and seal– Fill joints, clean haze, apply sealer after 24-72 hours
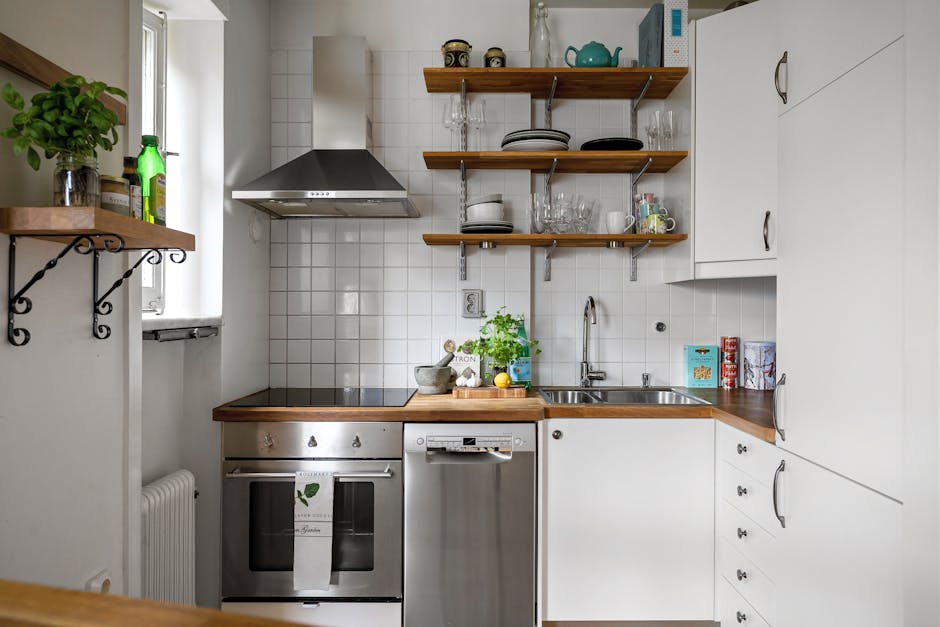
Whether you’re updating your kitchen backsplash with classic subway tiles or creating a stunning focal point behind your stove, proper tile setting makes the difference between aprofessional-looking resultand a DIY disaster.
The key to flawlesskitchen tile settinglies in preparation and patience. As one experienced contractor noted, “Going all out on prep work” ensures your backsplash will look beautiful for years to come.
Most kitchen backsplashes can be installed over clean, level drywall since they’re not considered wet areas like showers. You’ll need to leave a1/8-inch expansion gapwhere tile meets countertops and fill it with flexible caulk rather than grout.
 Prep surface and gather tools, 2) Plan layout and mark guidelines, 3) Set tiles with proper adhesive, 4) Grout joints and clean excess, 5) Seal grout and natural stone tiles - kitchen tile setting infographic infographic-line-5-steps-colors")
Step 1: Gathering Your Tools and Preparing the Surface
Think ofkitchen tile settinglike preparing for a big dinner party – you want everything ready before your guests (the tiles) arrive. The difference between a professional-looking backsplash and a weekend warrior disaster often comes down to preparation. Trust me, spending extra time getting organized now will save you from those “why didn’t I think of that?” moments later.
Essential Tools and Materials
Let’s talk about your toolkit. You don’t need to break the bank, but having the right tools makes all the difference between smooth sailing and pulling your hair out.
Start with yourmeasuring tapeand a good4-foot level– though if you can swing it, alaser levelis a game-changer for marking those perfectly straight reference lines. You’ll need anotched trowel(a 3/8-inch notch works for most tiles, but check your adhesive manufacturer’s recommendations), arubber grout float, and plenty ofsponges and buckets– at least two buckets so you’re not constantly dumping dirty water.
For cutting tiles, awet sawgives you the cleanest cuts, especially on porcelain. Most hardware stores rent them, and here’s a pro tip: spend the extra $50-$100 for a new blade. Your cuts will be cleaner, and you’ll avoid those heartbreaking chips. Keeptile nippershandy for those tricky corner cuts around outlets.
Don’t forget yourtiles– always order 10% extra. You’ll thank yourself when you accidentally drop one or need a replacement years later. Pick up yourtile adhesive(we’ll cover thinset vs. mastic shortly),grout, andtile spacers. Wedge spacers work great for handmade tiles and won’t slip on vertical surfaces.
Safety matters too – grabsafety glassesfor cutting andrubber glovesfor mixing. You’ll also wantcaulkthat meets ASTM C920 standards,blue painter’s tape,drop cloths, and somejoint compoundfor wall repairs.
Preparing Your Kitchen Walls for Tile
Here’s where patience pays off. A perfectly prepped wall is like a solid foundation – everything else builds on it.
Turn off the power first– seriously, don’t skip this step. Flip the circuit breaker and use a circuit tester to double-check. Then remove all outlet and switch covers. You’ll be amazed how much easier it is to tile around clean, open boxes.
Next comes the deep clean. Kitchen walls collect more grease than you’d think, and grease is adhesive’s worst enemy.TSP (Trisodium Phosphate)cuts through everything, or use a strong degreaser if you prefer. If your walls have glossy paint, give them a light sanding to rough up the surface.
Walk your walls with a critical eye, looking fordents, holes, or ripples deeper than 1/16 inch. Fill these with joint compound, let it dry completely, then sand smooth. This step prevents lippage – those annoying uneven tiles that catch light and scream “amateur hour.”
For most kitchen backsplashes,tiling over clean, level drywall works perfectly fine. Kitchen areas aren’t considered “wet zones” like showers, so you don’t need special backer board. However, if you’re the belt-and-suspenders type or dealing with a particularly moisture-prone area,cement backer boardlike Durock provides extra stability. Attach it with 1¼-inch screws, leave 1/8-inch gaps between panels, and seal seams with silicone.
One last consideration: if your backsplash doesn’t start directly on a countertop, you’ll need aledger board– a perfectly level piece of wood screwed into wall studs. This temporary support keeps your first row of tiles from sagging while the adhesive cures. Remove it once everything’s set, and you’ll have perfectly aligned tiles.
Step 2: Planning the Perfect Tile Layout
Here’s where the magic really happens – and where most DIY projects either shine or fall flat. A thoughtful layout is what separates a professional-lookingkitchen tile settingfrom one that screams “weekend warrior gone wrong.” The good news? With a little planning, you can absolutely nail this part.
Finding Your Starting Point and Creating Guidelines
Think of your backsplash like a picture frame – you want it to look balanced and intentional. The secret is starting from the right spot and working outward.
Identifying your focal pointis the first step. In most kitchens, this is the area behind your stove or range. Sometimes it’s a beautiful window above the sink if your tile extends all the way up. This is where people’s eyes naturally go first, so this is where we want ourkitchen tile settingto look absolutely perfect.
Here’s a pro tip: if you have multiple “centers” competing for attention (like the center between cabinets is different from the center of your range hood), don’t stress. Pick the most prominent one and “split the difference” to create something that looks visually balanced.
Using a level to mark reference linescomes next. Grab your 4-foot level (or better yet, a laser level if you have one) and draw a perfectly vertical centerline on your wall at your focal point. Then draw a horizontal line representing where your first row of tiles will sit – usually just above your countertop with that crucial 1/8-inch expansion gap we talked about.
These lines become your roadmap. Trust me, taking time to get them perfect now saves hours of frustration later.
For offset patterns like subway tile, there’s a neat trick called the quartering technique. If centering your pattern results in tiny slivers at the edges, you can “cheat” your starting point by up to 1/8 inch. This adjustment is invisible to the eye but makes a huge difference in how professional your finished backsplash looks.
How to Avoid Small, Awkward Cuts
Nobody wants their beautiful new backsplash to end with a pathetic sliver of tile that looks like it was cut with a butter knife. Here’s how we avoid that nightmare.
Dry-fitting your tilesis absolutely non-negotiable. Before you open a single container of adhesive, lay out your tiles on the countertop along the wall you’re planning to tile. This lets you see exactly how your pattern will fall and where you’ll need to make cuts.
You can also make what pros call a “jury stick” – just a piece of wood with your tile and grout line measurements marked on it. Use this to check your vertical layout too.
Adjusting your centerlinebased on your dry-fit can work wonders. Sometimes shifting that vertical centerline just an inch or two eliminates those tiny end cuts and gives you larger, more attractive pieces instead. The goal is visual balance, not mathematical perfection.
Hide cut tiles in less visible spotswhenever possible. Tuck them under upper cabinets, behind your coffee maker, or in corners where they won’t catch the eye.
Plan for a full tile at the countertopfor your vertical layout. Starting with a complete tile right off the counter gives you a clean, strong foundation that looks intentional and professional.
Leave that crucial 1/8-inch expansion gaparound the perimeter where tile meets cabinets and countertops. This isn’t just a suggestion – it’s insurance against cracks later when materials naturally expand and contract. We’ll fill this gap with flexible caulk, never grout.

Step 3: The Art of Kitchen Tile Setting
Here’s where the magic happens! After all that careful planning, you finally get to see your beautiful backsplash come together. But don’t rush this part – properkitchen tile settingdepends on choosing the right adhesive and placing each tile with care.

Best Practices for Kitchen Tile Setting Adhesive
Think of adhesive as the foundation of your entire project. Get this wrong, and even the most gorgeous tiles won’t stay put.
Thinsetis your reliable workhorse – a sand-and-cement mortar that comes in powder form. Modified thinset includes polymers that create a stronger bond, making it perfect for heavier tiles or areas with slight moisture. Always usewhite mortar for light-colored tilesto prevent any dark show-through that could dull your beautiful finish.
Masticoffers convenience as a premixed, latex-based adhesive. It’s particularly popular for wall applications like backsplashes because there’s no mixing required. However, it’s not suitable for floors or truly wet areas like showers, and it takes longer to dry than thinset.
For specialized applications,epoxy mortarprovides incredible durability and stain resistance, especially for nonporous glass and stone tiles. But it sets fast and requires professional-level experience to work with effectively.
When mixing powdered thinset, aim for apeanut-butter consistency. Add powder gradually to the specified amount of water, mix thoroughly, then let it “slake” for 5-10 minutes before remixing. The perfect mixture holds ridges when combed but spreads easily.
Here’s a pro tip:work in small sectionsof about 2×2 feet. Adhesive dries quickly, and you don’t want it skinning over before you get your tiles placed. Mix only what you can use in 20-30 minutes.
Apply adhesive with the flat side of yournotched trowel, then comb it with the notched side to create uniform ridges. These ridges collapse when you press the tile, ensuring complete contact. Just remember not to cover your reference lines with adhesive!
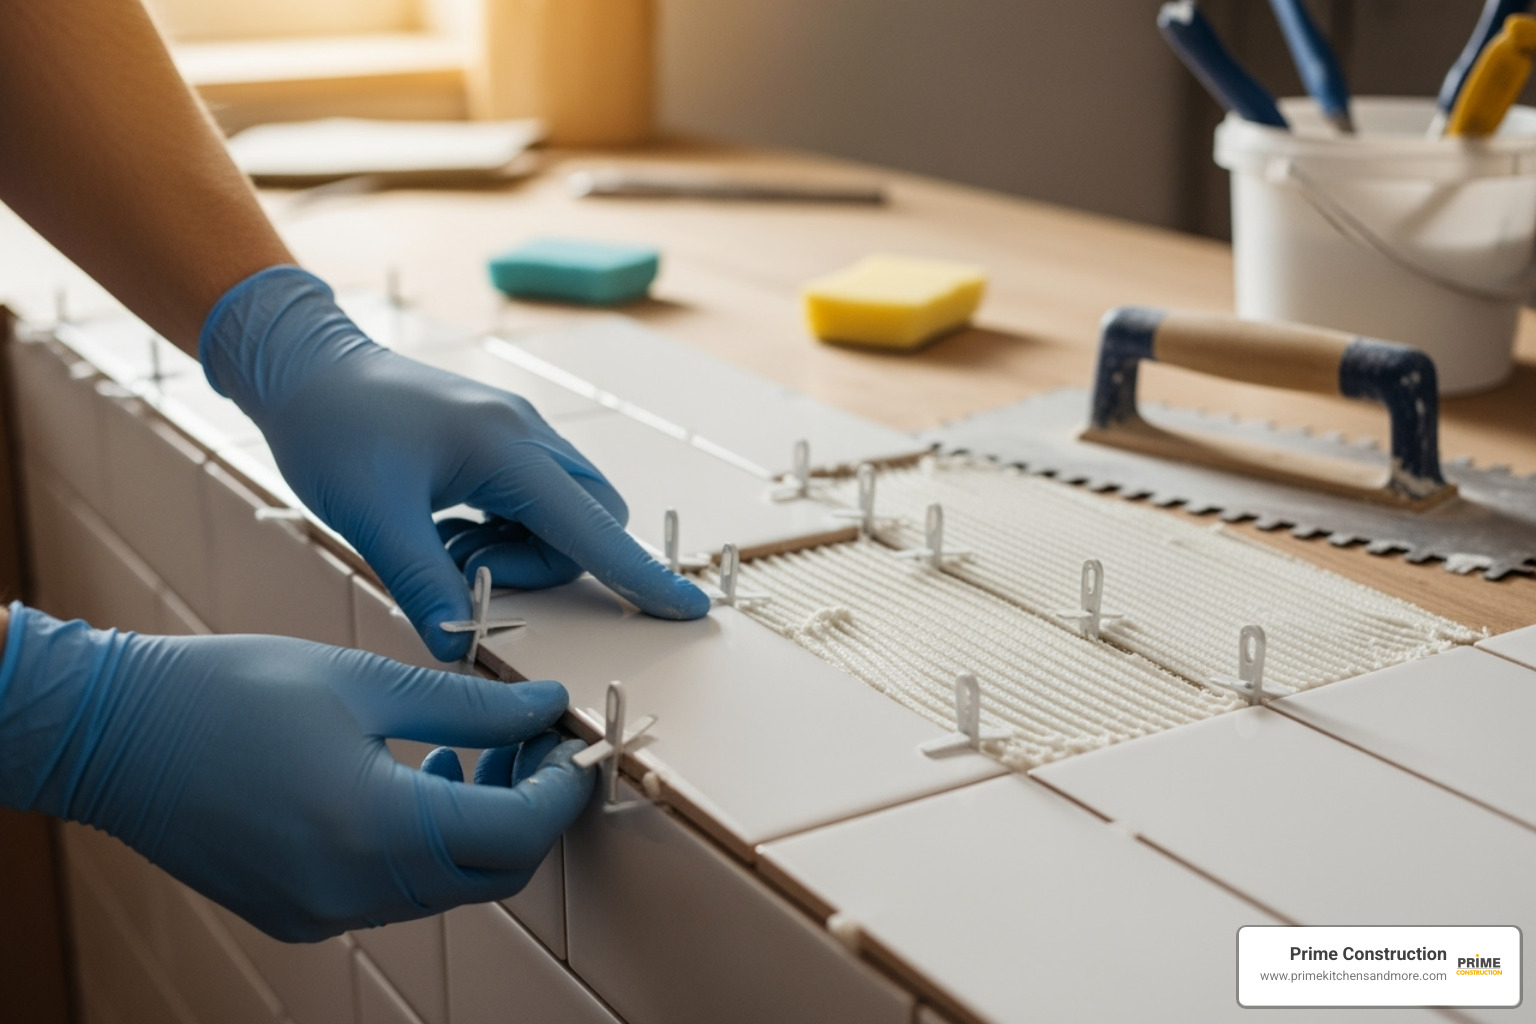
Placing, Cutting, and Fitting Your Tiles
This is where your patience pays off. Each tile needs individual attention to create that seamless, professional look.
Press each tile firmly into the adhesive with aslight twisting motion. This helps collapse those adhesive ridges and eliminates air pockets that could cause problems later. Inserttile spacersbetween each tile immediately – consistent grout lines make all the difference between amateur and professional results.
For natural stone tiles or any particularly large pieces, use theback buttering technique. Apply a thin coat of adhesive to the back of the tile in addition to the wall. This extra step ensures superior adhesion and eliminates air bubbles, achieving the 80% coverage professionals aim for.
When it comes to cutting tiles, awet saw is your best friend. It creates clean, precise cuts without chipping, especially important for porcelain and ceramic tiles. Place the glazed side down when cutting to minimize any potential chipping.
Cutting around outletsrequires careful measuring and marking. Use your wet saw for the main cuts, thentile nippersfor small adjustments and intricate shapes. Take your time here – rushing leads to mistakes that are hard to hide.
Mosaic sheetscan be tricky where they meet. If you notice visible seams, dry-fit the sheets first. Sometimes you’ll need to peel off individual tiles and place them independently to close gaps and create that seamless look.
Lippage– when one tile sits higher than its neighbor – is the enemy of professional-looking results. For larger tiles especially, consider using atile leveling system. These ingenious tools pull neighboring tiles into perfect alignment while the adhesive cures, ensuring your backsplash looks flawlessly flat.
This step takes time, but it’s worth doing right. Each tile you place with care contributes to a backsplash that’ll make you proud every time you walk into your kitchen.
Step 4: Grouting and Sealing for a Professional Finish
You’re almost there! These final steps in yourkitchen tile settingjourney will transform your carefully placed tiles into a stunning, durable backsplash that’ll make you smile every time you cook.
The Difference Between Grout and Caulk
Here’s something that trips up many DIYers – grout and caulk aren’t the same thing, and using them correctly makes all the difference in how your backsplash looks and lasts.
Grout is your tile’s best friendwhen it comes to filling the spaces between individual tiles. Think of it as the structural backbone that holds everything together, keeps dirt and water from sneaking behind your tiles, and gives your backsplash that finished, professional look. But here’s the key – grout is rigid once it dries.
Caulk is the flexible herothat handles all those tricky spots where your tile meets other surfaces. We’re talking about where your backsplash touches the countertop, meets the cabinets, or forms inside corners. Why the flexibility? Because your house is constantly moving – just tiny amounts – as temperatures change and materials expand and contract.
If you use grout in these spots, itwillcrack and fall out over time. Trust us on this one! Instead, reach for a high-quality, color-matching 100% silicone sealant that meetsASTM C920 standards. This standard ensures your sealant has the flexibility and waterproofing power to handle whatever your kitchen throws at it.
Applying Grout and Sealing Your New Backsplash
Once your tiles have been sitting pretty for about 24 hours and the adhesive is fully set, it’s grout time! This is where your backsplash really comes together.
First, let’s talk aboutsanded versus unsanded grout. The rule is simple: if your grout lines are less than 1/8 inch wide (like most subway tile installations), go withunsanded grout. It’s smoother and won’t scratch delicate surfaces. For wider gaps over 1/8 inch,sanded groutprovides the strength you need to prevent shrinkage.
Mixing your groutshould result in a thick, paste-like consistency – think frosting, not soup. Follow the package directions exactly, and don’t be tempted to add extra water if it seems thick. Too much water weakens the grout.
Now for the fun part! Put on those rubber gloves and scoop some grout onto your rubber float.Apply the grout diagonallyacross your tiles, pressing firmly to force it into all the joints. Don’t worry about being messy at this stage – we’ll clean it up.
After about 10 minutes, when the grout starts to firm up, it’s time to clean. Hold your float at a 90-degree angle andwipe away excess grout diagonally– this motion cleans the surface without pulling grout out of your carefully filled joints.
Cleaning the hazecomes next. Use a damp (not soaking) sponge to gently wipe the tile surface in circular motions. Keep that bucket of clean water handy for rinsing your sponge frequently. Less water is more here – too much can weaken your grout.
Don’t panic if you see a light haze forming as everything dries. This is normal! You can buff it off with a dry cloth once the grout has fully cured.
Patience is key during drying time. Your grout needs 24 to 72 hours to fully cure, depending on the product and your kitchen’s humidity. Wait at least 24 hours before applying any sealer.
Sealing is your insurance policyagainst stains and moisture – especially important in a kitchen where spills happen daily. All cement-based grouts need sealing, and if you used natural stone tiles like marble or limestone, they need sealing too. Glass, glazed ceramic, and high-gloss porcelain tiles can skip this step.
Invest in a quality water-based penetrating sealer (expect to spend at least $30 per quart – your backsplash is worth it!). Apply it according to the manufacturer’s instructions, and mark your calendar to reseal every 6 to 12 months for ongoing protection.
If you used natural stone, here’s a pro tip: seal those tiles at least three hoursbeforegrouting to prevent the grout from staining your beautiful stone.

Frequently Asked Questions about Kitchen Tile Setting
After years of helping Orlando homeowners with theirkitchen tile settingprojects, we’ve heard just about every question you can imagine. Here are the ones that come up most often – along with the honest answers that’ll save you time and headaches.
Should the countertop be installed before the backsplash?
Absolutely, yes! This is one of those “always do it this way” rules that’ll save you a world of trouble later.
Your countertop needs to go in first because the backsplash actually sits on top of it. We leave a small gap between the two (about 1/8 inch) that gets filled with flexible caulk rather than grout. This gap is crucial – it lets both materials expand and contract naturally without cracking.
There’s another practical reason too. Even the most expertly installed countertops have tiny variations and imperfections. When we install the backsplash after the counter is in place, we can account for these little quirks and ensure your first row of tiles looks perfectly straight relative to the countertop edge.
Can I tile directly over drywall for a kitchen backsplash?
Yes, you can – and in most cases, it’s perfectly fine! Kitchen backsplashes aren’t considered “wet areas” like shower walls, so you don’t need special cement backer board for most installations.
The key word here is “clean.” Your drywall needs to be in good shape – no major holes, bumps, or glossy paint that’ll prevent good adhesion. We always clean the walls thoroughly with TSP (trisodium phosphate) to remove any grease or grime that could interfere with the tile adhesive.
If your walls are in rough condition or you’re dealing with an area that might see more moisture (like directly behind a sink), cement backer board gives you extra peace of mind. But for mostkitchen tile settingprojects, properly prepared drywall works great.
How do you finish the exposed edge of a backsplash?
This is where attention to detail really shows, and you have several good options depending on your style and tile choice.
Bullnose tilesare probably the most traditional solution. These special pieces have one rounded, finished edge that creates a smooth transition. Most tile lines offer matching bullnose pieces, so everything looks coordinated.
Metal or PVC edging profileslike Schluter strips give you a clean, modern look. These thin strips get embedded right in the adhesive along your tile edge during installation. They come in different finishes – stainless steel, brushed nickel, even colored options.
For certain tiles, especially natural stone or high-end porcelain, you can have theedge professionally polished. This creates a smooth, finished surface that looks like the tile was meant to end there.
Don’t forget about that1/8-inch expansion gapwhere your backsplash meets cabinets or countertops. That always gets filled with color-matching caulk, not grout. It creates a neat, flexible seal that moves with your materials as they expand and contract.
Get a Flawless, Professional Backsplash
There’s something deeply satisfying about stepping back and admiring a beautifully tiled backsplash that you created with your own hands.Kitchen tile settingtransforms not just your space, but often how you feel about cooking and spending time in your kitchen.
The key to success lies in those foundational steps we’ve covered: taking time with surface preparation, planning your layout thoughtfully, applying adhesive correctly, setting tiles with precision, and finishing with proper grouting and sealing. Each step builds on the last, creating a result that rivals professional work.
Remember these crucial points for lasting success:
- Always prep your walls thoroughly and turn off power before starting
- Plan your layout to avoid awkward cuts and center on focal points
- Work in small sections with properly mixed adhesive
- Use spacers consistently and check for lippage as you go
- Allow proper drying time before grouting, and seal everything appropriately
Patience really is your best friend throughout this process. Rushing any step – from letting adhesive cure to allowing grout to dry properly – can compromise your beautiful work.
That said, we completely understand that life gets busy. Maybe you’ve started the project and realized it’s more complex than expected, or perhaps you’re looking at an intricate design that feels overwhelming. There’s no shame in calling in the professionals when you want guaranteed results.
At Prime Kitchens And More, we’ve been perfectingkitchen tile settingand full house remodeling for 15 years right here in Orlando and throughout Orange County, Seminole County, Winter Park, and Kissimmee. We use the same premium materials and careful techniques we’ve outlined in this guide, but with the speed and expertise that comes from hundreds of successful installations.
Whether you tackle this project yourself or decide you’d prefer professional installation, you’re on your way to a kitchen that truly reflects your style.Learn more about our backsplash installation services in Orlando, FLto see how we can bring your vision to life with the quality and attention to detail you deserve.