Why Bathroom Vanity Installation is the Perfect DIY Upgrade
Bathroom vanity installationcan completely transform your bathroom’s look and functionality. Whether you’re replacing an outdated unit or upgrading to something more stylish, this project offers a significant return on investment in both home value and daily convenience.
Quick Overview: What You Need to Know
- Average DIY Time:2-3 hours for a straightforward replacement
- Typical Cost Range:$100-$4,500 for the vanity; $665-$5,000+ for full replacement with professional help
- Key Skills Needed:Basic plumbing, ability to use power tools, and attention to detail
- When to DIY:Like-for-like replacements with no plumbing changes
- When to Hire a Pro:Complex plumbing modifications, moving the vanity, or installing heavy stone tops
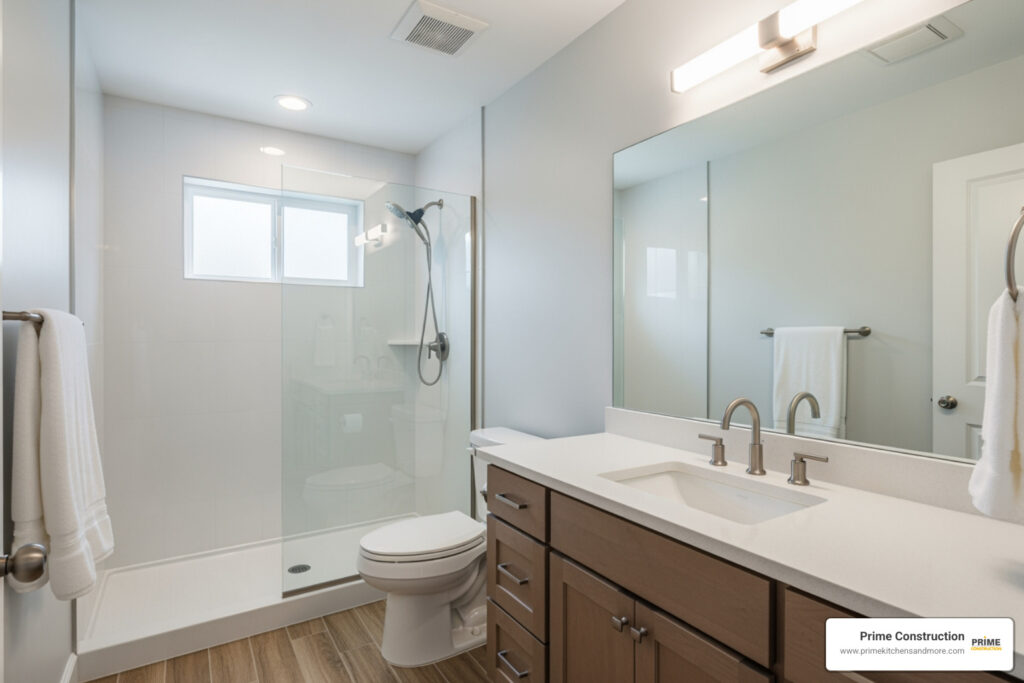
Thebathroom vanityis the unsung hero of the bathroom, playing a pivotal role in both function and aesthetics. A new vanity improves organization, provides crucial storage, and can significantly boost your home’s market value.
While many homeowners feel intimidated by this project, the good news is that with proper planning and a clear process,bathroom vanityinstallationis surprisingly DIY-friendly. This guide breaks down everything you need to know, from choosing the right vanity and budgeting accurately to the complete installation process. You’ll learn when to tackle the project yourself and when it makes sense to call in a professional.
 Turn off water and remove old vanity, 2) Prep space and mark stud locations, 3) Position new vanity and secure to wall studs, 4) Install countertop and faucet assembly, 5) Connect plumbing lines and drain, 6) Apply caulk and add finishing touches - bathroom vanity installation infographic")
Planning Your Project: Choosing a Vanity and Understanding Costs
Before turning a wrench, thorough planning is the most crucial step. This section covers choosing the right vanity and creating a realistic budget by breaking down all potential costs.
Choosing the Right Size and Style for Your Bathroom
The perfect vanity is about finding the right fit for your space and lifestyle. First, measure the available width, depth, and height, accounting for door and drawer clearance. Consider the overall layout—will a larger vanity make the space feel cramped? For small bathrooms, a corner or pedestal sink vanity can maximize floor space.
Next, think about style. Do you prefer a sleek, modern look or something more traditional?
- Freestanding vanitiesresemble furniture and offer a classic or contemporary look.
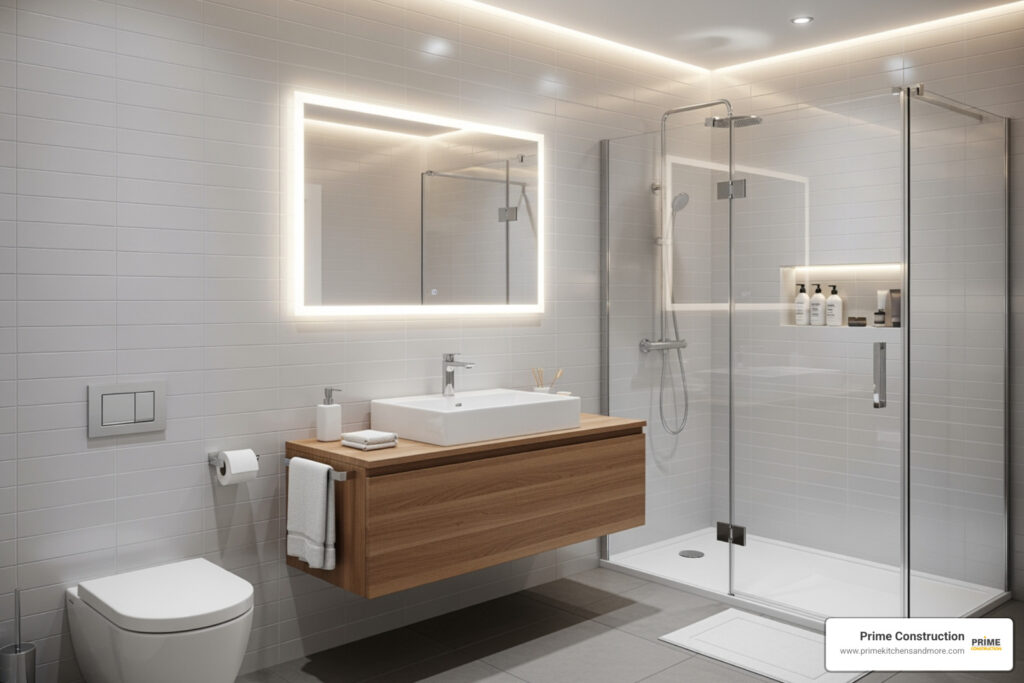
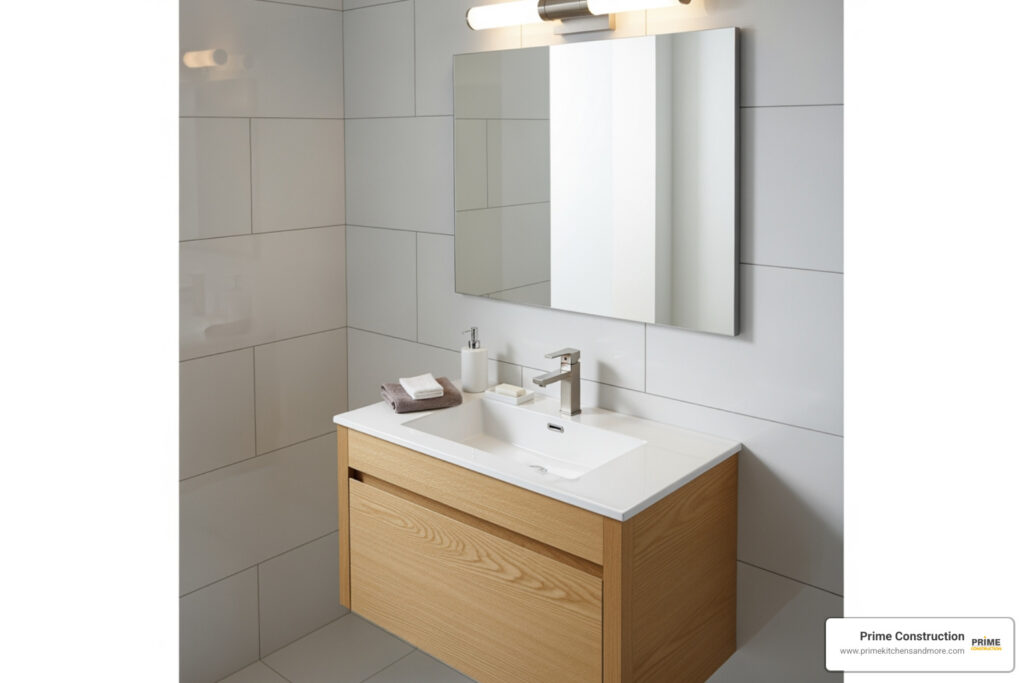
- Wall-mounted (floating) vanitiesattach to the wall, creating a sense of spaciousness ideal for modern designs.
- Consider asingle vs. double sink. A double vanity (typically 4 feet or larger) is a great solution for busy, shared bathrooms.
- Material selection also plays a huge role in aesthetics and durability, from wood cabinets to countertops like granite, quartz, or cultured marble.
For more inspiration, you can exploremore design ideas.
A Breakdown of Bathroom Vanity Types
Let’s dive deeper into the types of vanities you’ll encounter.

- Freestanding Vanities: The most common type, these rest on the floor and are easy to install. They come in a wide variety of styles and sizes, offering ample storage, though they can feel bulky in smaller bathrooms.
- Floating Vanities: Mounted directly to the wall, these modern vanities create an open, spacious feel and make cleaning the floor easy. They require strong wall support (studs) and can be more complex to install.
- Corner Vanities: Designed to fit into a corner, these are excellent for maximizing space in small or unusually shaped bathrooms but offer limited storage and style options.
- Double Vanities: Featuring two sinks, these are perfect for shared master suites but require a larger footprint (4+ feet) and have a higher cost.
Vanities are also distinguished by how they are manufactured:
- Prefabricated Vanities: These ready-made units are convenient, affordable ($100 to $2,600), and easier to install. They often come as complete sets but offer limited customization.
- Custom-Built Vanities: Crafted specifically for your bathroom, these allow for a perfect fit and unique design but come with a significantly higher cost ($3,000 to $4,500 for the cabinet alone) and longer lead times.
Budgeting for Your Vanity: Installation and Additional Costs
Understanding potential costs upfront is key. The average labor cost for a basicbathroom vanity installationruns $200 to $1,000. A full replacement, including removal and plumbing, can range from $665 to $5,000+, depending on the job’s complexity.
Here’s a breakdown of potential costs:
- Vanity Unit Cost: Prefabricated units range from $100 to $2,600, while custom-built cabinets alone can cost $3,000 to $4,500.
- Labor Costs: Basic installation is $200-$1,000, while a full replacement is $665-$3,300. Plumbers charge $45 to $200 per hour.
- Additional Costs: Don’t forget these potential expenses:
- Old Vanity Removal: $115 to $500 if you hire a pro.
- Backsplash Installation: $1.50 to $30 per square foot.
- Plumbing Work: Moving plumbing can cost $400 to $2,200. This is especially true in Orlando, where homes on slab foundations may require trenching concrete. A new sink ($40-$300) and faucet ($70-$900) also add to the cost.
- Flooring/Trim Adjustments: $500 to $1,000 if the vanity footprint changes.
- Wall Removal: $300 to $1,000 in rare cases.
The Complete Guide to DIY Bathroom Vanity Installation
With planning complete, it’s time to get your hands dirty. This section provides a step-by-step walkthrough of thebathroom vanity installationprocess.
Gathering Your Tools and Materials
Before you begin, gather all your tools and materials to avoid interruptions.

- Essential Tools: Tape measure, level, stud finder, drill with bits (including hole saw), adjustable wrenches, caulking gun, utility knife, bucket, screwdriver set, pencil, safety glasses, and gloves.
- Essential Materials: New vanity (cabinet, countertop, sink), faucet, drain assembly (P-trap, tailpiece), hot and cold water supply lines, silicone caulk, wood shims, 3-inch screws, and plumber’s tape (Teflon tape).
Step 1: Removing the Old Vanity and Prepping the Space
First, create a clean slate for your new installation.
- Shut Off Water & Disconnect Plumbing: Turn off the water supply valves under the sink (or the main water supply). Open the faucet to drain residual water. Place a bucket under the P-trap to catch water, then disconnect the supply lines and the P-trap drain assembly.
- Remove the Old Vanity: Use a utility knife to cut any caulk sealing the vanity to the wall. Locate and remove the screws securing the vanity to the wall studs. Carefully pull the old unit away from the wall.
- Clean and Repair: Thoroughly clean the wall and floor, removing old caulk and debris. Patch any holes in the drywall and paint the area if the new vanity has a different footprint.
Step 2: Positioning and Securing the New Vanity
This step ensures your new vanity is perfectly placed, level, and secure.
- Mark Studs and Plumbing: Use a stud finder to locate and mark wall studs. Dry fit the new vanity cabinet and mark where the water supply and drain pipes align with the back of the cabinet.
- Cut Openings and Position: If the vanity has a solid back, use a hole saw to drill openings for the plumbing. Slide the vanity into position.
- Level and Secure: Place a level on top of the vanity. Use wood shims under the base to make it perfectly level on uneven floors. Once level, drill pilot holes through the vanity’s mounting rail into the marked wall studs and secure it with 3-inch screws. For floating vanities, ensure the mounting brackets are securely fastened to multiple studs, as they bear the full weight.
Step 3: Installing the Countertop, Faucet, and Drain
Now, add the countertop and get the sink ready for action.
- Set the Countertop: If your countertop is separate, run a bead of silicone adhesive along the top edges of the cabinet. With a helper, carefully lower the countertop into place, aligning it perfectly.
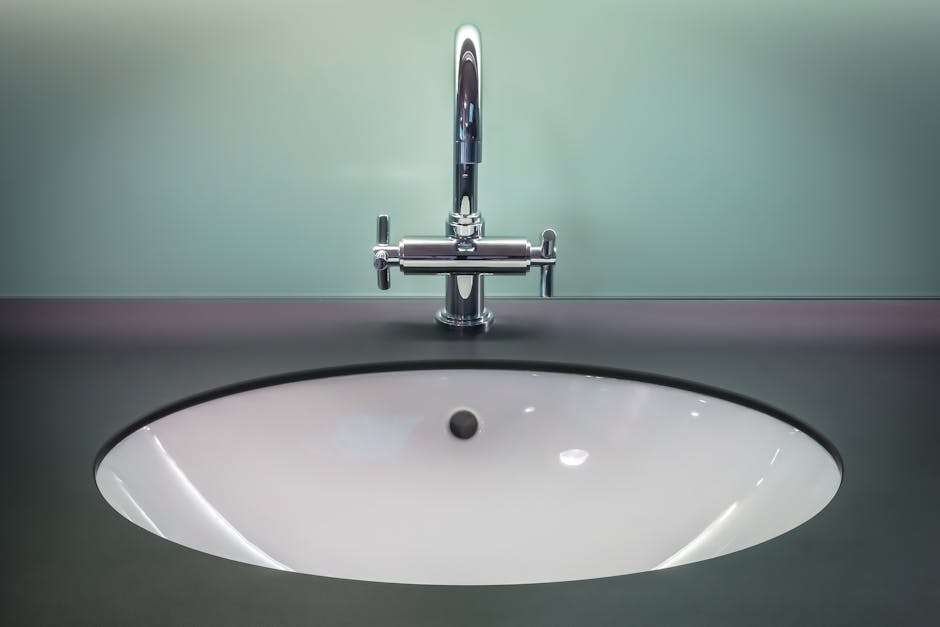
- Install Faucet and Drain: It’s often easier to install the faucet before the top is permanently in place. Insert the faucet and handles into the pre-drilled holes and secure them from underneath with the provided hardware. Next, install the drain assembly into the sink basin, ensuring a watertight seal with the included gaskets.
Step 4: Connecting the Plumbing and Finishing Touches
This is the final step to bring your new vanity to life.
- Connect Water Lines: Attach the new hot and cold supply lines to the faucet stems and the shut-off valves. Hand-tighten, then give a final snug turn with a wrench.
- Connect the Drain: Assemble the P-trap, connecting it to the sink’s drain tailpiece and the drain pipe in the wall. Use plumber’s tape on the threads and tighten the slip nuts.
- Check for Leaks: Slowly turn the water back on and thoroughly inspect every connection for drips. Run water, fill the sink, and let it drain while checking the supply lines, faucet base, and drain assembly.
- Apply Caulk and Install Backsplash: Apply a bead of mildew-resistant silicone caulk where the countertop meets the wall for a professional finish and to prevent water damage. If you have a separate backsplash, attach it with adhesive and caulk the seams.
- Clean Up: Wipe down your new vanity, clean up any residue, and admire your handiwork!
For more detailed guidance, you can refer toA guide to installing faucets.
DIY vs. Hiring a Pro: Making the Right Choice
Deciding whether to DIY or call a professional is a personal choice based on project complexity, your skill level, and your budget.
The DIY Approach: Pros, Cons, and When It’s a Good Fit
Many homeowners love to improve their properties themselves.
- Pros of DIY: The biggest motivator is saving on labor costs ($200-$1,000+). You also gain a sense of accomplishment and learn new skills.
- Cons of DIY: The project requires basic plumbing knowledge and comfort with tools. It can take a novice a half-day or longer, and mistakes can lead to costly repairs that erase any savings.
- When It’s a Good Fit: DIY is a great option for simple, like-for-like replacements where the plumbing lines up perfectly and you have the necessary tools and time.
When to Call a Professional for Your Bathroom Vanity Installation
Knowing your limits is key to a successful project. Hiring a pro ensures the job is done right the first time.
Call a professional for:
- Complex Plumbing Changes: Moving the vanity, adding a second sink, or dealing with old pipes requires a licensed plumber. In Orlando, homes on slab foundations can make rerouting plumbing a major job.
- Heavy or Difficult Installations: Lifting heavy stone tops like granite or quartz is best left to pros with the right equipment.
- Lack of Time or Tools: If you’re short on time or don’t want to buy tools for a one-off job, hiring a pro is a practical choice.
- Peace of Mind: Professionals offer warranties on their work, guaranteeing a flawless finish and resolving any issues that may arise.
The cost for professionalbathroom vanity installationtypically ranges from $665 to $3,300. While it’s an investment, it often saves time, stress, and potential future repair costs. Our team at Prime Kitchens And More has 15 years of experience in bathroom design and installation in the Orlando area, ensuring high-quality results.
Troubleshooting Common Installation Problems
Even the best plans can hit a snag. Here are solutions to common issues that can arise duringbathroom vanity installation.
| Common Problem | Quick-Fix Solution |
|---|---|
| Leaky Connections | Identify the leak source (supply lines, faucet, or drain). For supply lines/faucet, gently tighten nuts with a wrench. For the drain/P-trap, loosen slip nuts, check that gaskets are seated correctly, apply plumber’s tape to threads, and re-tighten. |
| Vanity Not Level | Use wood shims. Place shims under the low points of the base until the vanity is level, checking both front-to-back and side-to-side. Secure the vanity to the wall and trim the excess shim material. |
| Gaps Between Vanity and Wall | For small gaps (1/8 inch or less), fill with silicone caulk. For larger gaps, add a piece of trim or quarter-round molding, then caulk the seams. An uneven wall may be the culprit, not the vanity. |
| Slow Drain | This often indicates a blockage or P-trap issue. Check that the P-trap is clear and correctly aligned and that the pop-up stopper isn’t obstructing flow. If the problem persists, the main drain line may be clogged, requiring a plumber. |
| Misalignment with Existing Plumbing | For minor issues, flexible supply lines or a flexible P-trap can work. If the misalignment is significant, you may need to carefully enlarge the vanity’s cutouts. For major alignment problems, consult a plumber to adjust the rough-in plumbing. |
| Loose Fixtures | If a faucet or drain feels wobbly, tighten the mounting nuts underneath the sink. If the vanity itself is loose, ensure it’s securely screwed into at least two wall studs. |
| Sealant Problems | If caulk peels or molds, it was likely applied to a dirty or damp surface. Remove the old caulk completely, clean the area with rubbing alcohol, let it dry, and reapply a fresh bead of mildew-resistant kitchen and bath caulk. |
Frequently Asked Questions about Bathroom Vanity Installation
We know you might have some lingering questions, so we’ve gathered a few common ones to help you feel even more confident about yourbathroom vanity installation.
Do bathroom vanities need to be anchored to the wall?
Yes, absolutely! It is best practice to secure all vanities, including freestanding models, to the wall studs. This isn’t just about preventing tipping (though that’s a huge safety benefit, especially if you have kids or pets!). Anchoring also protects your plumbing connections from stress and movement, ensuring their longevity and preventing leaks. A securely mounted vanity will feel solid and stable, which is what we all want in our bathroom fixtures.
Can I install a vanity without a backsplash?
You certainly can, but it’s not always recommended without proper precautions. A backsplash serves as a crucial barrier, protecting the wall behind your sink from water splashes and moisture damage. If you opt to skip the backsplash for a cleaner, more modern look, you must ensure the wall behind the sink is properly waterproofed. This means using a high-quality, water-resistant paint or, ideally, tiling the area. Without adequate protection, constant water exposure can lead to drywall damage, mold, and mildew, creating bigger problems down the road.
What should I do if my floor is uneven?
Uneven floors are a common challenge, especially in older homes. The solution is simple: use wood or composite shims under the base of the vanity cabinet. Place your level on top of the vanity and add or adjust shims under the lowest points until it is perfectly level both front-to-back and side-to-side. Once the vanity is stable and level, you can secure it to the wall studs. After it’s anchored, carefully trim off any excess shim material that protrudes from beneath the vanity. This ensures a stable and properly aligned installation, preventing stress on plumbing connections and ensuring doors and drawers operate smoothly.
Conclusion
Well, there you have it! We’ve journeyed through the exciting world ofbathroom vanity installation, from picking the perfect style to tightening the last screw. We hope you’ve seen that with careful planning, the right tools, and a clear step-by-step process, this can be a truly rewarding and manageable DIY project.
Planning is essential. Understanding your space, choosing the right vanity type, and budgeting for all potential costs will set you up for success. While many aspects of vanity installation are DIY-friendly, it’s also crucial to know when to call a pro. For complex plumbing changes, heavy installations, or simply for the peace of mind that comes with expert workmanship, professional help is invaluable.
A new vanity isn’t just a functional upgrade; it transforms your bathroom, enhancing its style, organization, and overall value. For professional results and complex projects in the Orlando area, the experienced team at Prime Kitchens And More ensures a flawless finish, bringing 15 years of expertise in bathroom design and installation to your home.
Ready to give your bathroom the upgrade it deserves?Get a quote for your bathroom vanity installation in Orlandotoday, and let us help you achieve the bathroom of your dreams!